Color Replace

In: Adjustments
Description
Replace a chosen color or value in a channel.
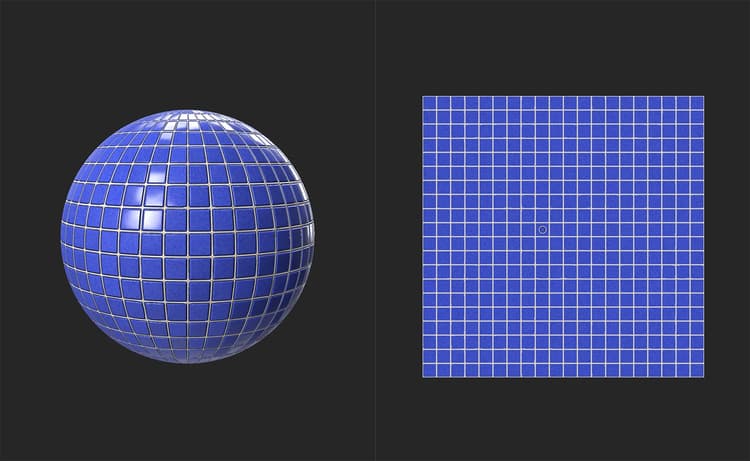
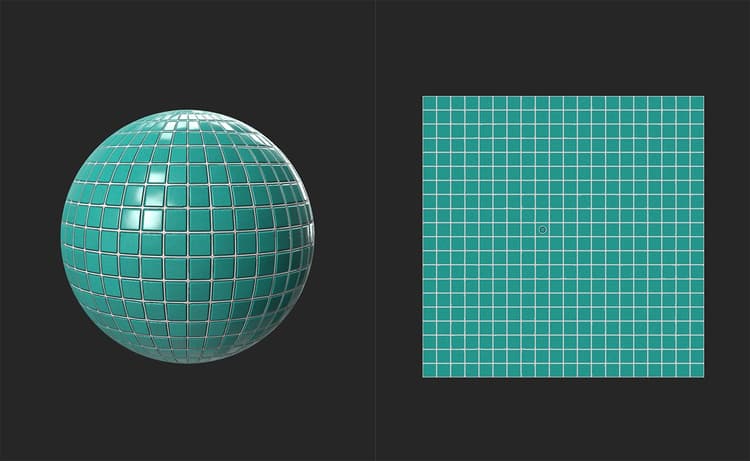
The images below show Color Replace in action. Notice how the areas between the tiles remains the same color - only the tiles themselves are changed.
Parameters
Basic parameters
-
Advanced Segmentation: toggle
When enabled, the filter can use a separate channel to generate mask information from the channel that is affected by the Color Replace.- Mask From:
Select a channel to act as a source for mask generation. For example, mask from the metallic value replace the base color of metallic areas of the material
- Mask From:
-
Replace In:
Select the channel affected by color replacement. -
Target Color: color select
Select the color that will replace the current channel colors. -
Luminosity Variation: 0-1
Adjust how much the of the original luminosity values are affected by the new color’s luminosity. -
Mask Range
The Mask is created based on the combination of the following values- From Luminosity: 0-1
The luminosity range used to build the mask - From Color: 0-1
The color range used to build the mask
- From Luminosity: 0-1
-
Mask Smoothness: 0-1
Adjust the granularity of the mask -
Mask Blur: 0-1
Blur the mask
Mask
This mask is separate from the mask created under Basic parameters - you can use a custom mask to paint or use an image to specify areas to be affected by the Color Replace filter as a whole.
-
Use Custom Mask: toggle
Enable or disable the use of a custom mask. If enabled the following parameters appear:- Mask: image/brush
Select an image to use as a mask or use the brush to paint a custom mask directly in the 2D view - Custom Mask - Blur: 0-1
Blur the mask - Custom Mask - Invert: toggle
Invert the mask
- Mask: image/brush
Usage Guide
The Color Replace filter is a powerful way to modify the appearance of your materials - for example, use it to turn iron rust into oxidized copper
The filter works by first creating a mask based on the luminosity and color values of a chosen point, and then replacing the color of the area defined by that mask. So, to use the filter:
-
Add the Color Replace filter to the layer stack
-
Determine which channel you want to use to build the mask, and which channel you want to replace the color of
- If you want to base the mask on one channel but replace the color of another, then enable Advanced Segmentation and select the respective channels.
- If you want to base the mask on a channel and replace the color of the same channel, leave Advanced Segmentation disabled.
-
Move the control in the 2D view over the color that you’d like to replace.
-
Adjust which areas the mask covers by using the Mask Range, Mask Smoothness, and Mask Blur controls.
-
Select a Target Color, and adjust the Luminosity Variation until you’re happy with the effect.
-
Optionally add a custom mask to only apply the effects of the filter in the chosen areas. The custom mask does not impact the mask created in step 1, instead it is an additional mask that you can use to further adjust where the effect is applied.
Sometimes it can be useful to use multiple Color Replace filters on top of one another to create more advanced effects.