Create a source connection and dataflow to stream LAVA data using the UI
Follow this step-by-step guide to help you set up your own LAVA source connector in the Experience Platform user interface.
Getting started
This tutorial requires a working understanding of the following components of Experience Platform:
-
Experience Data Model (XDM) System: The standardized framework by which Experience Platform organizes customer experience data.
- Basics of schema composition: Learn about the basic building blocks of XDM schemas, including key principles and best practices in schema composition.
- Schema Editor tutorial: Learn how to create custom schemas using the Schema Editor UI.
-
Real-Time Customer Profile: Provides a unified, real-time consumer profile based on aggregated data from multiple sources.
Connect your LAVA account
In the Experience Platform UI, select Sources from the left navigation bar to access the Sources workspace. The Catalog screen displays a variety of sources with which you can create an account.
You can select the appropriate category from the catalog on the left-hand side of your screen. Alternatively, you can find the specific source you wish to work with using the search option.
Under the Streaming category, select LAVA, and then select Add data.

Select data
The Select data step appears, providing an interface for you to select the data that you bring to Platform.
- The left part of the interface is a browser that allows you to view the available data streams within your account;
- The right part of the interface lets you preview up to 100 rows of data from a JSON file.
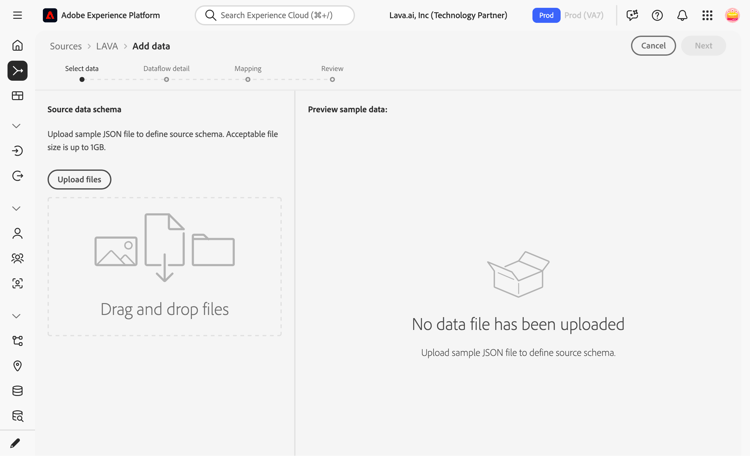
Select Upload files to upload a JSON file from your local system, or upload the sample file from the Overview section corresponding to the dataset you are setting up. Alternatively, you can drag and drop the JSON file you want to upload into the Drag and drop files panel.
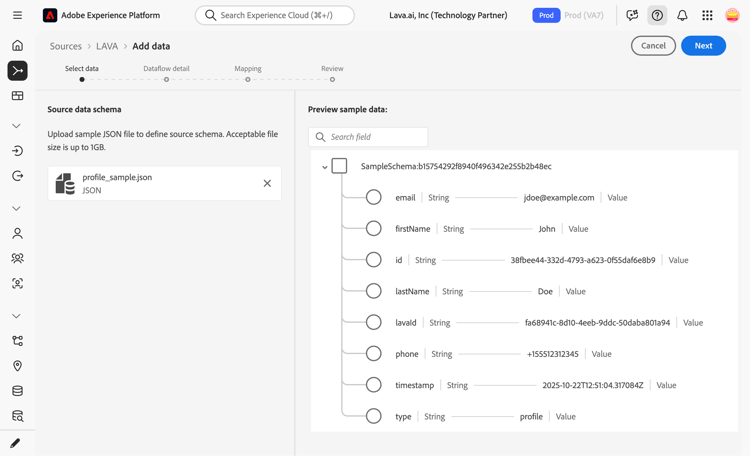
Once your file uploads, the preview interface updates to display a preview of the schema you uploaded. The preview interface allows you to inspect the contents and structure of a file. You can also use the Search field utility to access specific items from within your schema.
When finished, select Next.
Dataflow detail
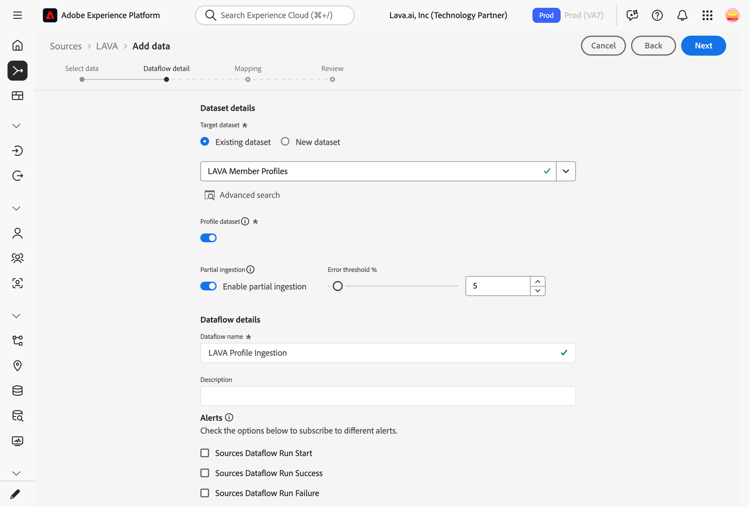
The Dataflow detail step appears, providing you with options to use an existing dataset or establish a new dataset for your dataflow, as well as an opportunity to provide a name and description for your dataflow. During this step, you can also configure settings for Profile ingestion, error diagnostics, partial ingestion, and alerts.
When finished, select Next.
Mapping
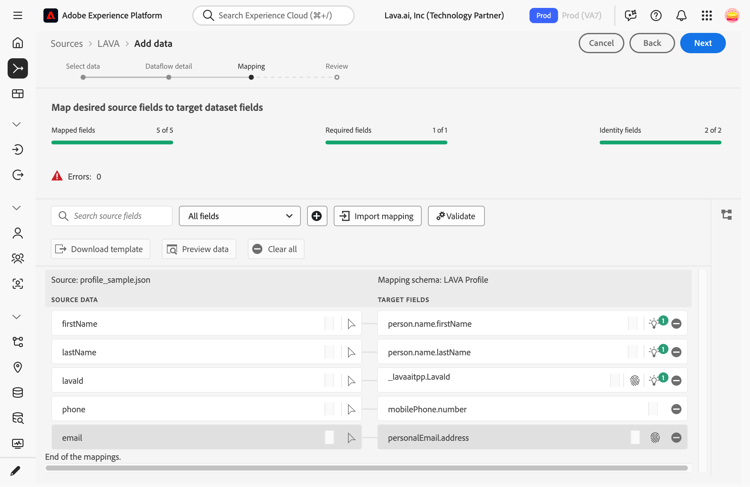
The Mapping step appears, providing you with an interface to map the fields from your source schema to their appropriate target XDM fields in the target schema.
When using LAVA’s provided schema, use the following recommended mapping:
| table 0-row-2 1-row-2 2-row-2 3-row-2 4-row-2 5-row-2 layout-auto | |
|---|---|
| LAVA Source Connector Field | LAVA Profile Schema Field |
lavaId |
_tenant.lavaId |
firstName |
person.name.firstName |
lastName |
person.name.lastName |
email |
personalEmail.address |
phone |
mobilePhone.number |
| table 0-row-2 1-row-2 2-row-2 layout-auto | |
|---|---|
| LAVA Source Connector Field | LAVA Profile Schema Field |
lavaId |
_tenant.lavaId |
balances[] |
_tenant.balances[] |
| table 0-row-2 1-row-2 2-row-2 3-row-2 4-row-2 5-row-2 6-row-2 7-row-2 8-row-2 9-row-2 10-row-2 11-row-2 12-row-2 13-row-2 14-row-2 15-row-2 16-row-2 17-row-2 18-row-2 19-row-2 20-row-2 21-row-2 22-row-2 23-row-2 24-row-2 25-row-2 26-row-2 27-row-2 28-row-2 layout-auto | |
|---|---|
| LAVA Source Connector Field | LAVA Event Schema Field |
calculated field to_map("LavaId",to_array(false,to_object("id",lavaId,"primary",true))) |
identityMap |
type |
eventType |
timestamp |
timestamp |
eventId |
_tenant.ticketScan.eventId |
eventName |
_tenant.ticketScan.eventName |
eventLabel |
_tenant.ticketScan.eventLabel |
venue |
_tenant.ticketScan.venue |
venueLabel |
_tenant.ticketScan.venueLabel |
section |
_tenant.ticketScan.section |
sectionLabel |
_tenant.ticketScan.sectionLabel |
row |
_tenant.ticketScan.row |
seat |
_tenant.ticketScan.seat |
gate |
_tenant.ticketScan.gate |
gateLabel |
_tenant.ticketScan.gateLabel |
transactionId |
_tenant.transaction.transactionId |
referenceId |
_tenant.transaction.referenceId |
subtotal |
_tenant.transaction.subtotal |
total |
_tenant.transaction.total |
location |
_tenant.transaction.location |
items[] |
_tenant.transaction.items[] |
redeemedAmount |
_tenant.transaction.redeemedAmount |
rewardsApplied[] |
_tenant.transaction.rewardsApplied[] |
amount |
_tenant.ledger.amount |
expiresAt |
_tenant.ledger.expiresAt |
rewardId |
_tenant.ledger.rewardId |
rewardName |
_tenant.ledger.rewardName |
rewardSlug |
_tenant.ledger.rewardSlug |
rewardType |
_tenant.ledger.rewardType |
| table 0-row-2 1-row-2 2-row-2 3-row-2 4-row-2 5-row-2 6-row-2 7-row-2 8-row-2 9-row-2 10-row-2 11-row-2 12-row-2 13-row-2 14-row-2 layout-auto | |
|---|---|
| LAVA Source Connector Field | LAVA Event Schema Field |
calculated field to_map("LavaId",to_array(false,to_object("id",lavaId,"primary",true))) |
identityMap |
eventId |
_tenant.ticketScan.eventId |
eventName |
_tenant.ticketScan.eventName |
eventLabel |
_tenant.ticketScan.eventLabel |
venue |
_tenant.ticketScan.venue |
venueLabel |
_tenant.ticketScan.venueLabel |
section |
_tenant.ticketScan.section |
sectionLabel |
_tenant.ticketScan.sectionLabel |
row |
_tenant.ticketScan.row |
seat |
_tenant.ticketScan.seat |
gate |
_tenant.ticketScan.gate |
gateLabel |
_tenant.ticketScan.gateLabel |
type |
eventType |
timestamp |
timestamp |
| table 0-row-2 1-row-2 2-row-2 3-row-2 4-row-2 5-row-2 6-row-2 7-row-2 8-row-2 9-row-2 10-row-2 11-row-2 layout-auto | |
|---|---|
| LAVA Source Connector Field | LAVA Event Schema Field |
calculated field to_map("LavaId",to_array(false,to_object("id",lavaId,"primary",true))) |
identityMap |
transactionId |
_tenant.transaction.transactionId |
referenceId |
_tenant.transaction.referenceId |
subtotal |
_tenant.transaction.subtotal |
total |
_tenant.transaction.total |
location |
_tenant.transaction.location |
items[] |
_tenant.transaction.items[] |
redeemedAmount |
_tenant.transaction.redeemedAmount |
rewardsApplied[] |
_tenant.transaction.rewardsApplied[] |
type |
eventType |
timestamp |
timestamp |
| table 0-row-2 1-row-2 2-row-2 3-row-2 4-row-2 5-row-2 6-row-2 7-row-2 8-row-2 9-row-2 layout-auto | |
|---|---|
| LAVA Source Connector Field | LAVA Event Schema Field |
calculated field to_map("LavaId",to_array(false,to_object("id",lavaId,"primary",true))) |
identityMap |
amount |
_tenant.ledger.amount |
expiresAt |
_tenant.ledger.expiresAt |
rewardId |
_tenant.ledger.rewardId |
rewardName |
_tenant.ledger.rewardName |
rewardSlug |
_tenant.ledger.rewardSlug |
rewardType |
_tenant.ledger.rewardType |
type |
eventType |
timestamp |
timestamp |
Alternatively, you can manually adjust mapping rules to suit your use cases. Based on your needs, you can choose to map fields directly, or use data prep functions to transform source data to derive computed or calculated values. For comprehensive steps on using the mapper interface and calculated fields, see the Data Prep UI guide.
Once your source data is successfully mapped, select Next.
Review
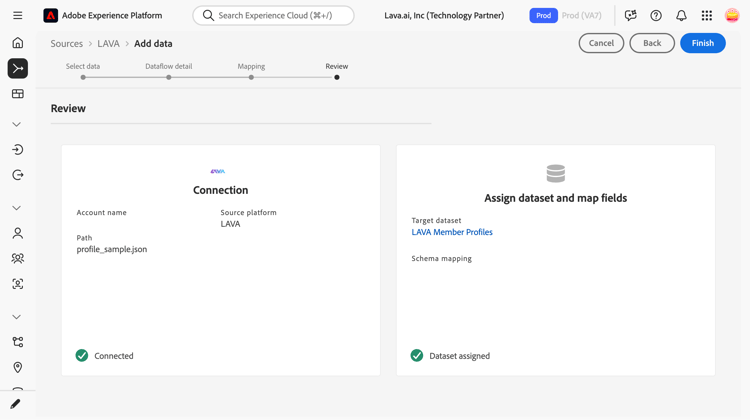
The Review step appears, allowing you to review your new dataflow before it is created. Details are grouped within the following categories:
- Connection: Shows the source type, the relevant path of the chosen source file, and the number of columns within that source file.
- Assign dataset & map fields: Shows which dataset the source data is being ingested into, including the schema that the dataset adheres to.
Once you have reviewed your dataflow, select Finish and allow some time for the dataflow to be created.
Get your streaming endpoint URL and Dataflow ID
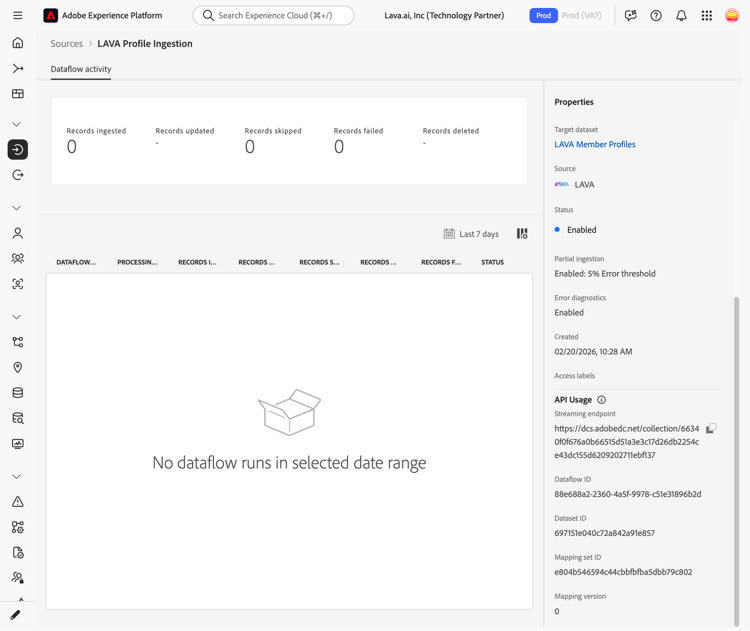
With your streaming dataflow created, you can now retrieve your streaming endpoint URL and Dataflow ID. These will be used to configure LAVA, allowing your streaming source to communicate with Experience Platform.
To retrieve your streaming endpoint, go to the Dataflow activity page of the dataflow that you just created and copy the endpoint from the bottom of the Properties panel.
Integrate LAVA with your webhook
In the LAVA Console, navigate to Resources > Data Export.
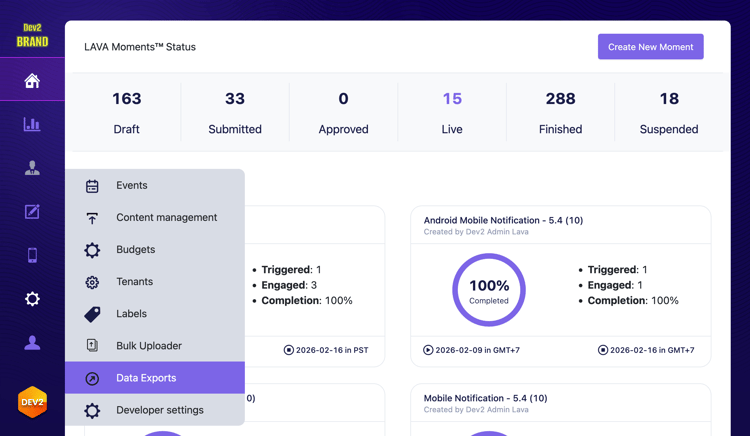
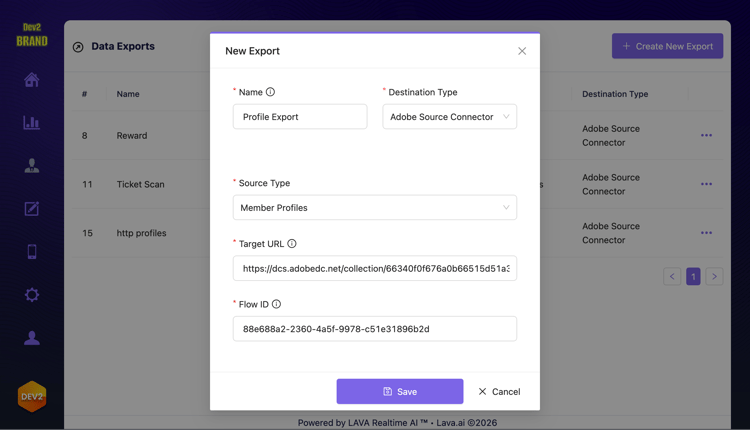
Select Create New Export, then choose Adobe Source Connector as the destination type. Next, select the source data you want to send and enter the streaming endpoint URL along with the dataflow ID.