AI Assistant
Refer to the following table for a comparison of AI Assistant (Legacy) and AI Assistant (Next-Gen):
All users get access to AI Assistant (Next-Gen) and associated Experience Platform agents. Note:
- Adobe Experience Manager: Your administrator must grant you the permission to access AI Assistant (Next-Gen) through the Adobe Admin Console.
- Customer Journey Analytics: Your administrator must grant you the permission to access AI Assistant through Customer Journey Analytics Access Control. This allows you to ask product knowledge and data insights questions.
AI Assistant is an intelligent conversational, generative AI tool that will boost productivity and redefine work in Adobe Experience Platform-based Applications. You can use AI Assistant to access Adobe Experience Platform Agents and other AI capabilities.
Read this guide to learn how you can use AI Assistant.
Access AI Assistant
There are several ways to access AI Assistant.
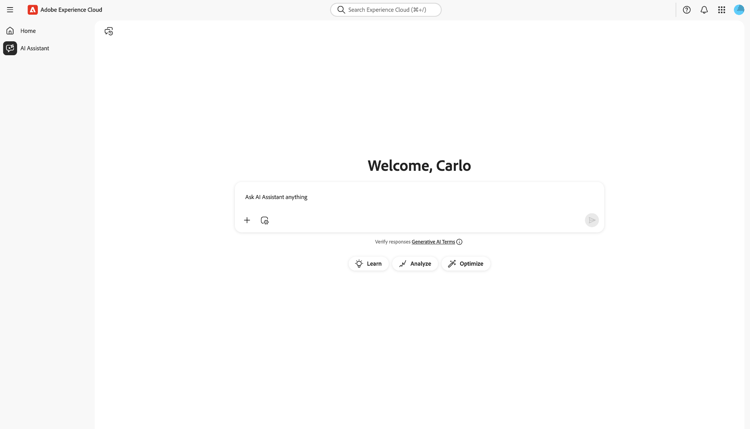
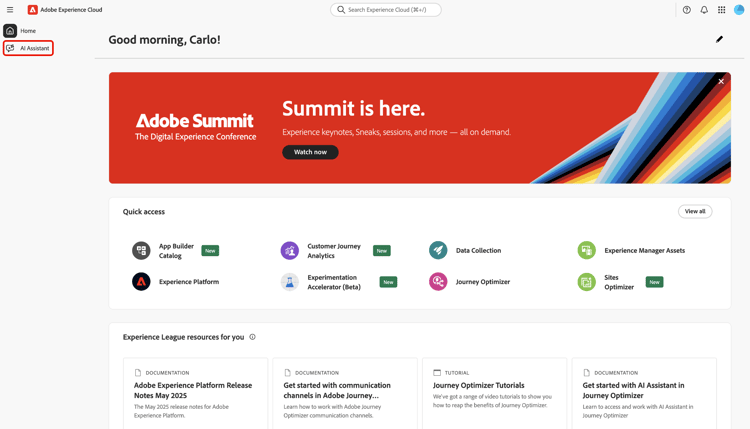
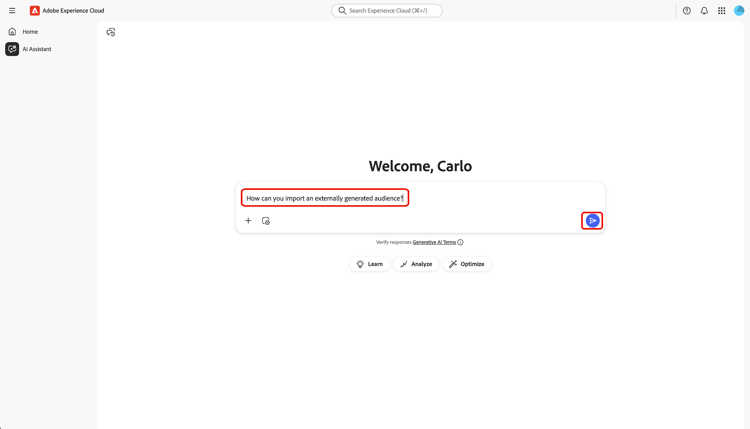
In the Experience Cloud home interface, select AI Assistant from the left-navigation to launch a full-screen view of AI Assistant.
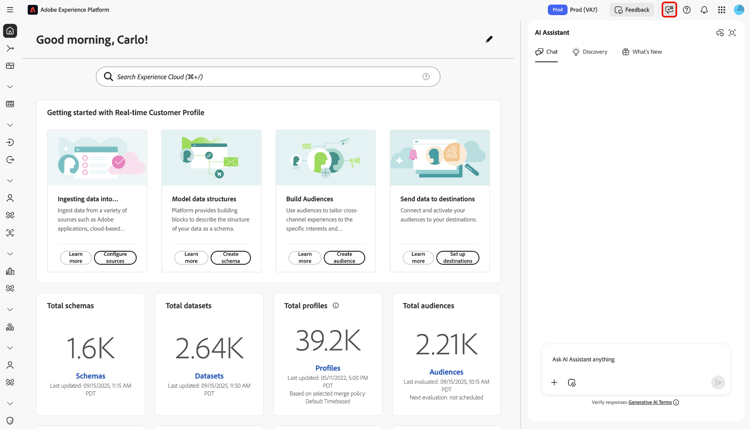
You can also launch AI Assistant from the home pages of Experience Cloud applications such as Experience Platform, Adobe Journey Optimizer, and Customer Journey Analytics. Navigate to your product home page and then select the AI Assistant icon from the top header to launch the AI Assistant chat panel on the right rail.
Navigate the AI Assistant user interface
Read this section to learn how you can navigate the AI Assistant interface.
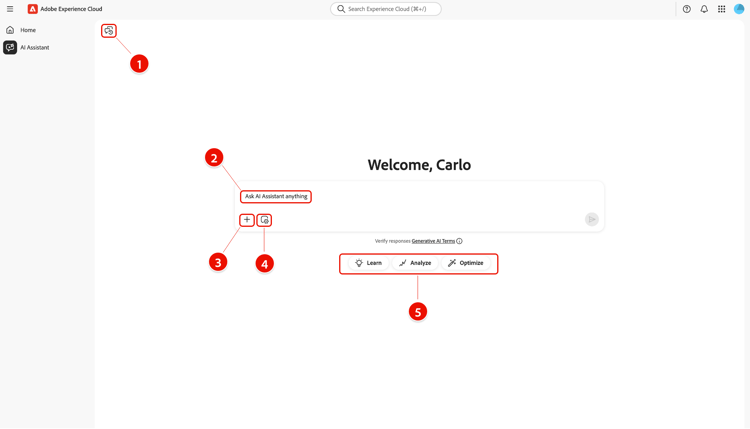
Full screen view
The AI Assistant interface includes several key elements to help you interact effectively:
- Conversations: Select the Conversations icon to start a new conversation and access recent conversations from your history. For more information, read the section on conversations.
- Input box: Select the input box to enter questions and prompts for AI Assistant. For more information, read the section on input features.
- Data and object autocomplete: - Select the plus icon to use data and object suggestion and autocomplete. When selected, you can use a pop-up window to select suggested entities. For more information, read the section on data and object autocomplete.
- Context setting: - Select the Context setting icon to configure information sources for AI Assistant. You can use this tool to configure the application, sandbox, and dataview that AI Assistant references in order to answer your query. For more information, read the section on context setting.
- Discovery: - Select Learn, Analyze, and Optimize to view sample queries that you can use to get started. For more information, read the section on discoverability prompts.
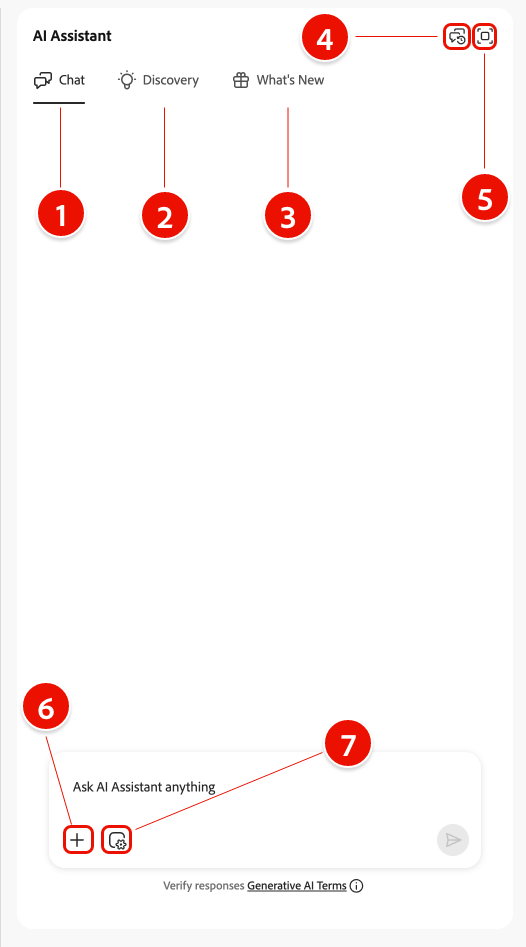
Rail view
The rail view provides quick access to chat, discovery prompts, updates, conversations, and interface controls in a compact panel.
- Chat: Select Chat from the header to return to your conversation in the event that you left to access different elements on the interface.
- Discovery: Select Discovery to view a list of AI Assistant prompts organized by category. You can use these pre-configured prompts to populate your chat. Additionally, you can tweak the suggested prompts to meet your particular use case.
- What’s New: Select What’s New to view a list of the latest updates available to AI Assistant.
- Conversations: Select the Conversations icon to start a new conversation and access recent conversations from your history. For more information, read the section on conversations.
- Full screen view: Select the Full screen view icon to change your AI Assistant interface from the right rail to full screen mode.
- Data and object autocomplete: Select the plus icon to use data and object suggestion and autocomplete. When selected, you can use a pop-up window to select suggested entities. For more information, read the section on data and object autocomplete.
- Context setting: Select the Context setting icon to configure information sources for AI Assistant. You can use this tool to configure the application, sandbox, and dataview that AI Assistant references in order to answer your query. For more information, read the section on context setting.
AI Assistant UI guide
This section provides an overview of the main features and navigation options in the AI Assistant user interface. It explains how to access AI Assistant, describes the layout and controls in both full screen and rail views, and introduces key tools such as conversations, input features, autocomplete, context setting, and discovery prompts. The following sections offer detailed guidance on using these features to interact with AI Assistant and get the most out of your experience.
Discovery prompts discovery-prompts
You can use AI Assistant’s discovery feature to view a list of the general subjects, grouped into entities, that AI Assistant supports. Discovery prompts are different depending on your starting point.
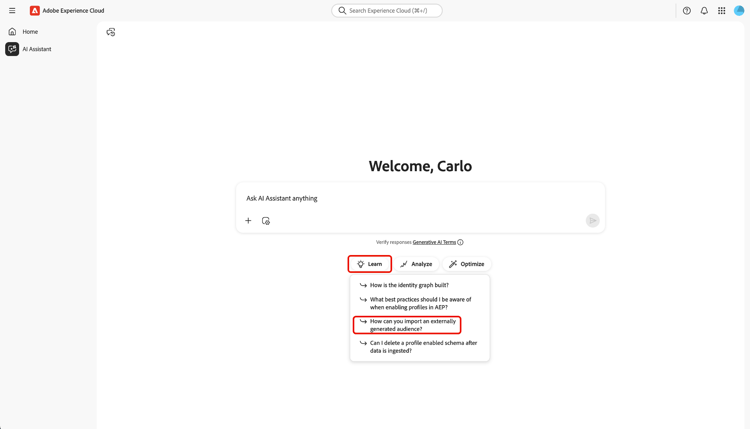
From the full screen view, discovery prompts are grouped into three categories: Learn, Analyze, and Optimize.
To use discovery prompts to advance product knowledge, select Learn and then select a prompt from the dropdown window that appears.
Select Discovery from the rail view to access an extensive list of discovery prompts that you can use to get started and populate your chat with AI Assistant.
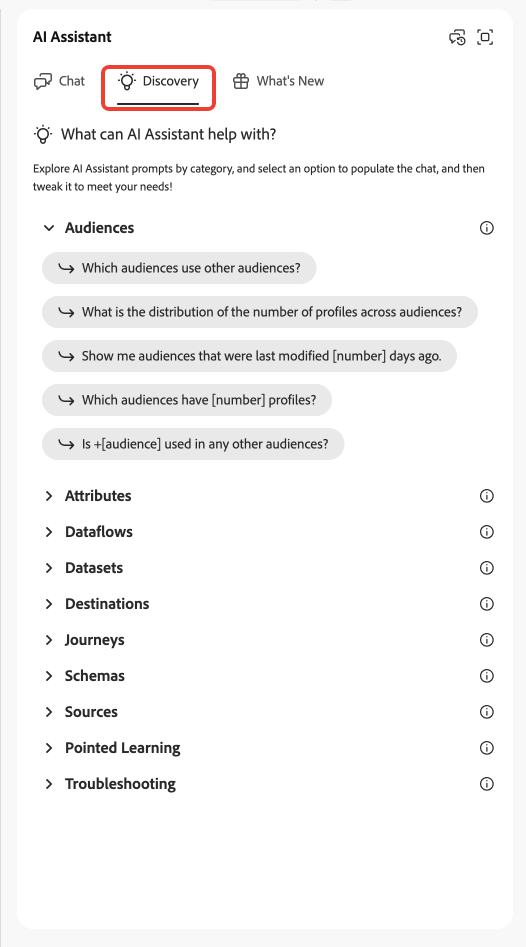
Select a prompt to populate the input box. From here, you can edit the prompt to fit your particular use case. When ready, select the send icon on the right to submit your query.
Interacting with responses
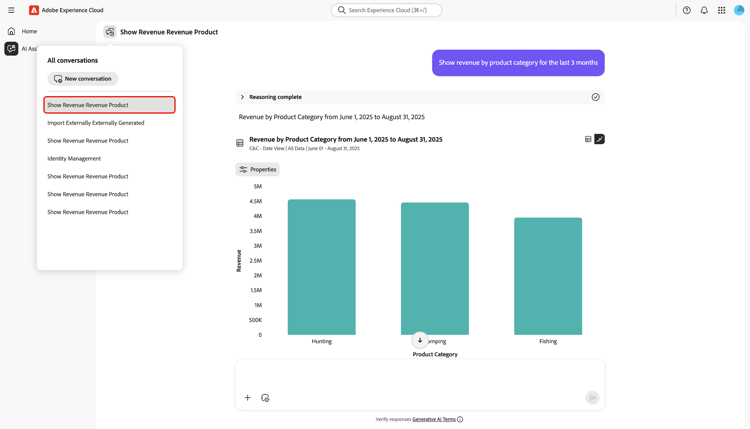
Check for reasoning process reasoning
AI Assistant then queries its knowledge base and computes an answer. After a few moments, AI Assistant returns an answer, including options to dive deeper into its reasoning process, related suggestions, information sources, and feedback tools.
To better understand the underlying reasoning process, select Reasoning complete.
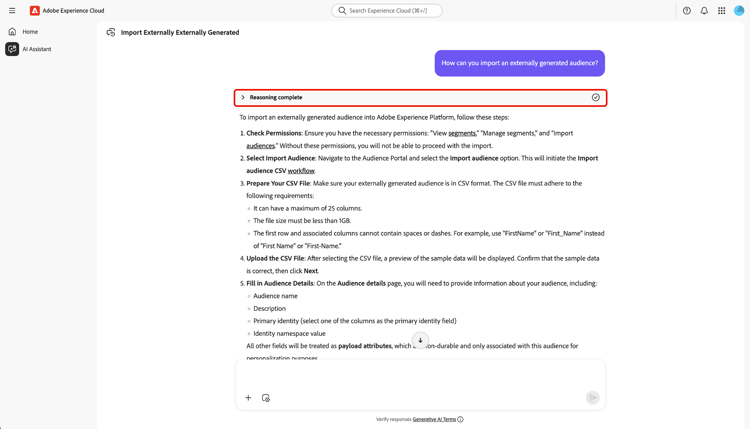
The Reasoning complete window expands to display a summary of your request and details on how the response was crafted.

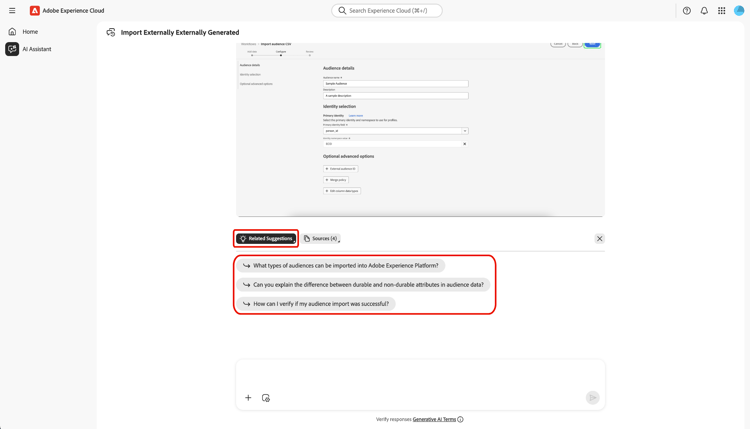
Use related suggestions
Next, navigate down to the bottom of the response and select Related suggestions to receive a list of prompts relating to your initial query. You can use these prompts to further continue your conversation with AI Assistant.
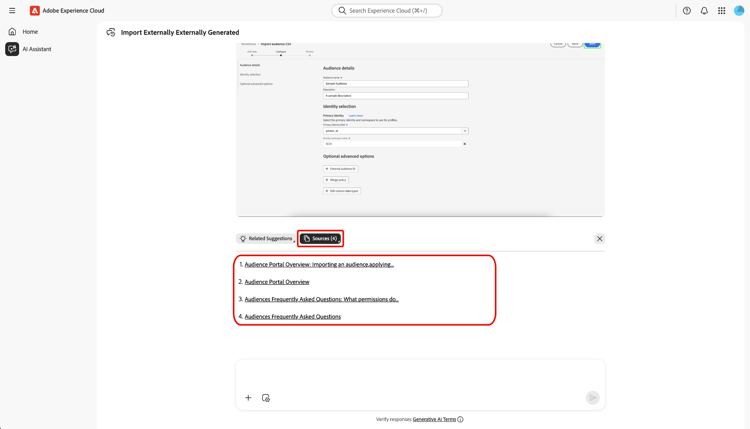
View sources
To verify AI Assistant’s response, select Sources to view a list of information sources that AI Assistant referenced when calculating its response.
Provide feedback
You can provide feedback of your experience with AI Assistant using the options provided with answer.
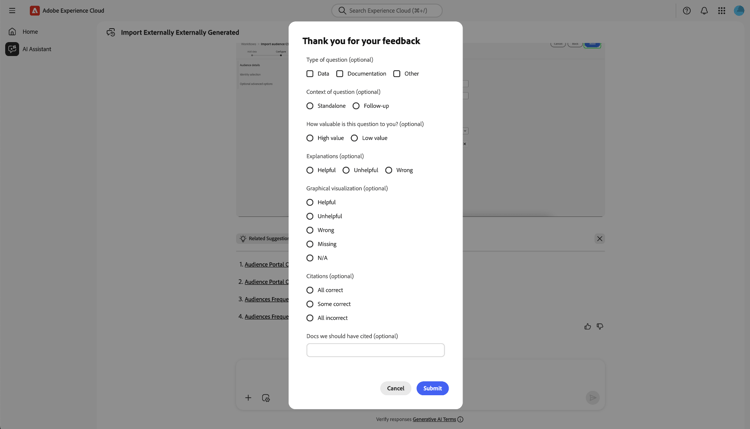
To provide feedback, select either thumbs up or thumbs down after receiving a response from AI Assistant, and then input your feedback in the provided text box.

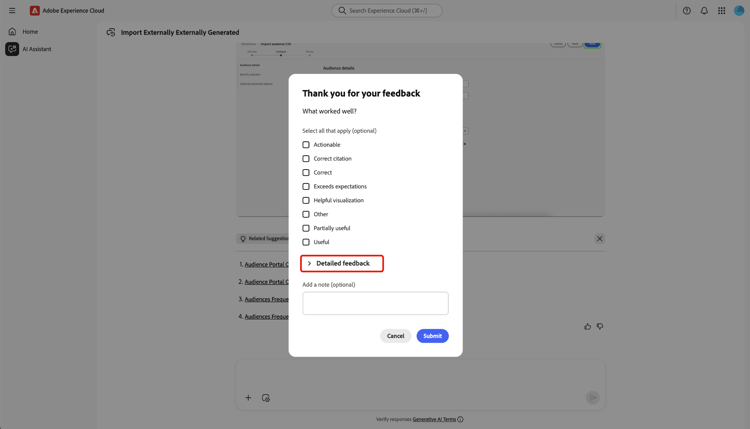
Select Thumbs up to provide positive feedback. You can optionally select from a list of positive feedback or use the input box to enter your own specific feedback.
| accordion |
|---|
| Select to view |
|
You can also select Detailed feedback to further elaborate on your feedback. When finished, select Submit.
|
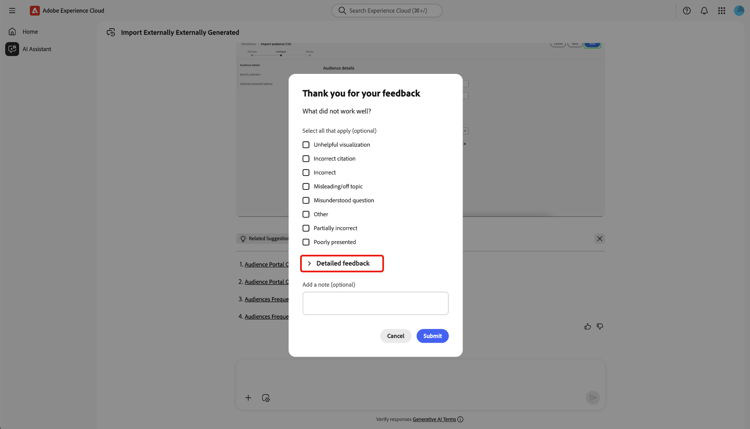
Select Thumbs down to provide constructive feedback. You can optionally select from a list of constructive feedback or use the input box to enter your own specific feedback.
| accordion |
|---|
| Select to view |
|
Similarly, you can also select Detailed feedback to further elaborate on your feedback. When finished, select Submit.
|
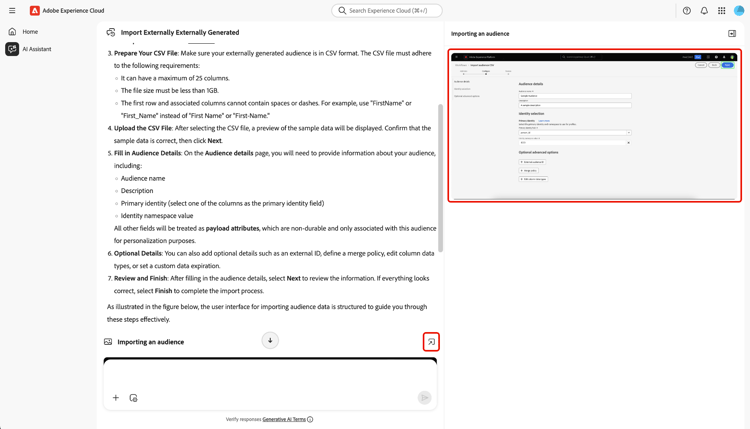
Use the split-view feature
If AI Assistant’s response includes an image, you can select the path icon to launch a split-view mode. This allows you to read the entirety of AI Assistant’s response with contextual image displayed on the right.
Conversations
You can use the All conversations panel to reset and revisit conversations with AI Assistant. Select the Conversations icon to view the All conversations window.
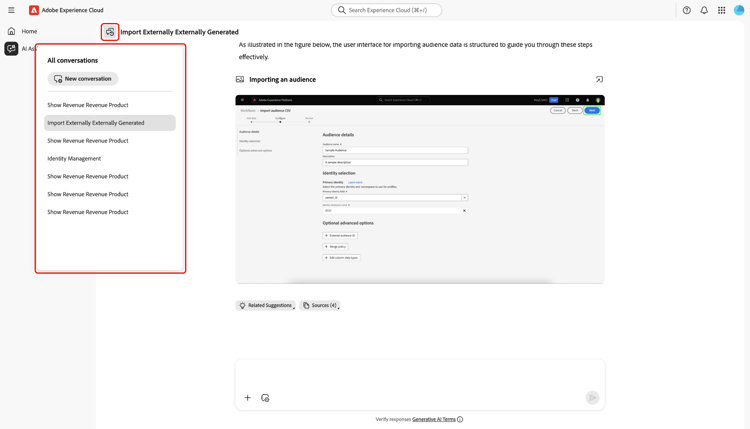
To revisit a previous conversation, select the conversation topic from the list provided.
To start a new conversation, select New conversation.
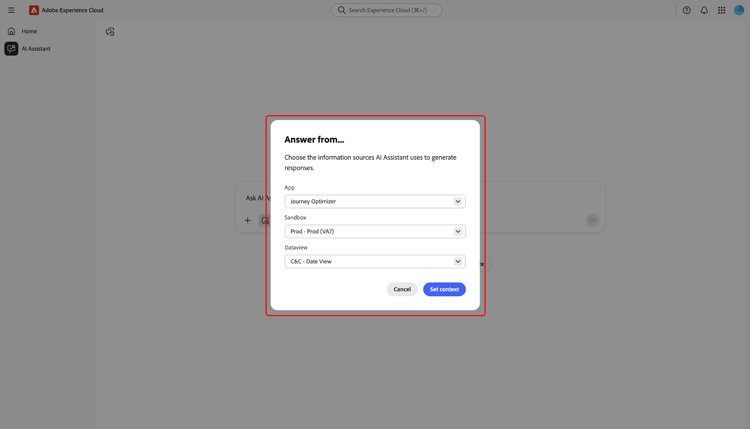
Context setting context-setting
Use the context setting feature of AI Assistant to configure the application, sandbox, and dataview that AI Assistant references to answer your query. To access context setting, select the Context setting icon from the input box.
The Answer from… pop-up window appears. Use this window to configure the information sources that you want to use and then select Set context.
When you’re using AI Assistant with Customer Journey Analytics, the dataview setting helps the Data Insights Agent understand:
- Which datasets to query
- What data components are available
- How to structure responses about your data
- Which visualizations to create in Analysis Workspace
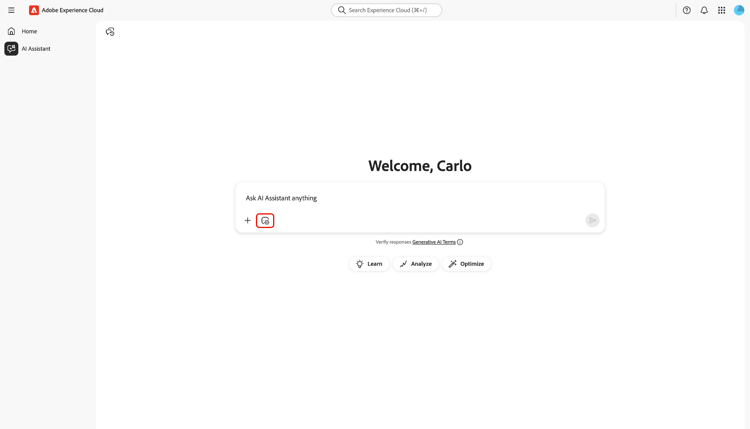
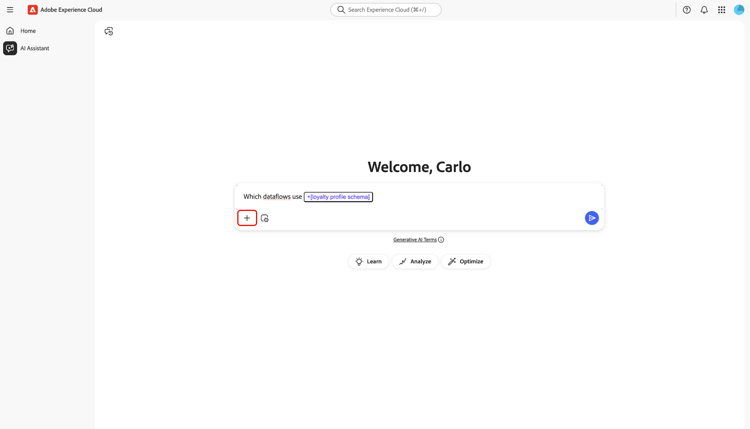
Data and object autocomplete
You can use the autocomplete function to receive a list of data objects that exist in your sandbox. To use autocomplete, input the plus icon (+) in your query. As an alternative, you can also select the plus icon (+) located at the bottom of the text input box. A window appears with a list of recommended data objects from your sandbox.
Verify responses
There are a number of ways that you can verify responses from AI Assistant. Select Query Term Matched to Objects to view a summary of the terms in your query that were matched to specific objects in your organization.
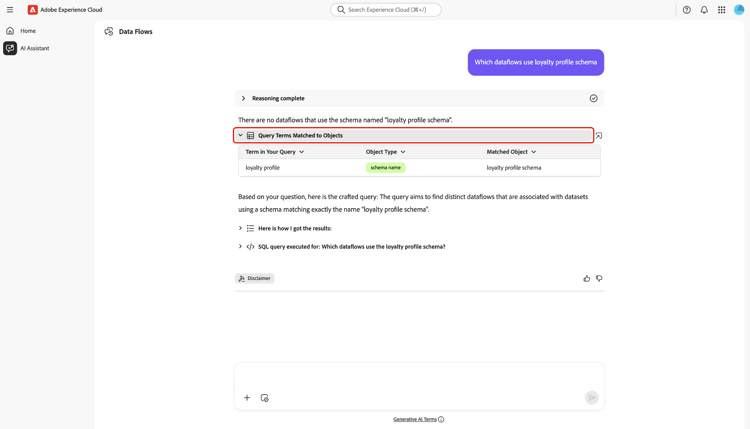
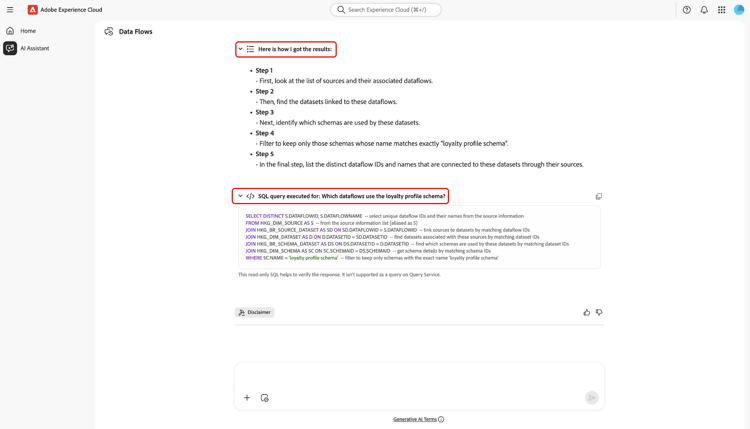
Select Here is how I got the results to see a detailed, step-by-step explanation of how AI Assistant arrived at its answer. Additionally, you can also view the SQL query that was executed to answer your question. This query is read-only and is not supported for use in Query Service.
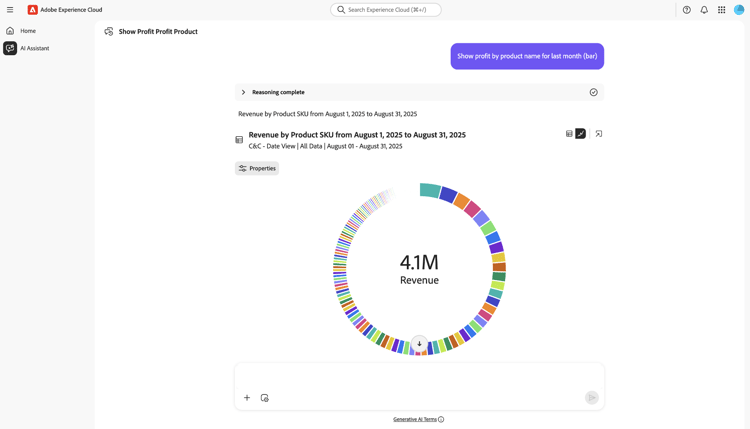
Configure data visualization
You can use AI Assistant’s data visualization capabilities to gain a better understanding of your data. You can also specify the type of graph that you want to use in your query. For example, submit a query that says: “Show profit by product name for last month (bar)” to receive a bar graph of profit in the last month, organized by product name.
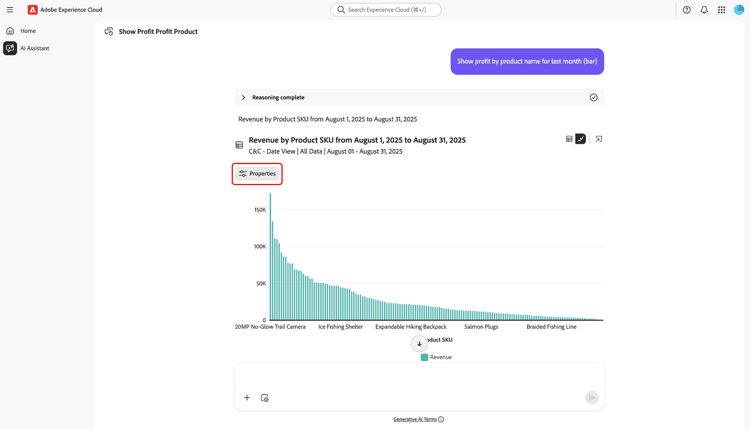
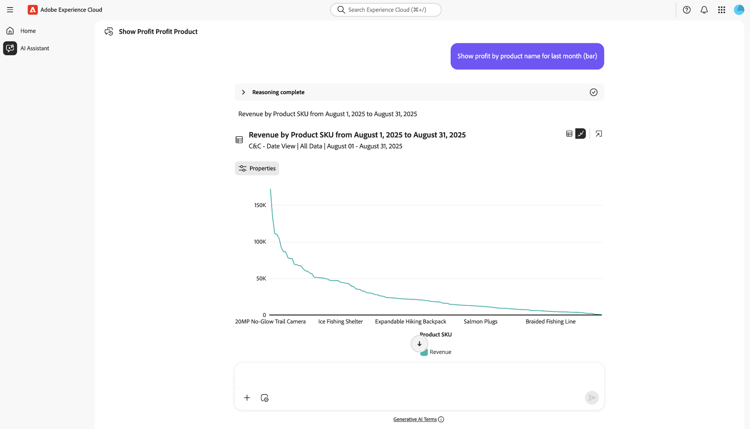
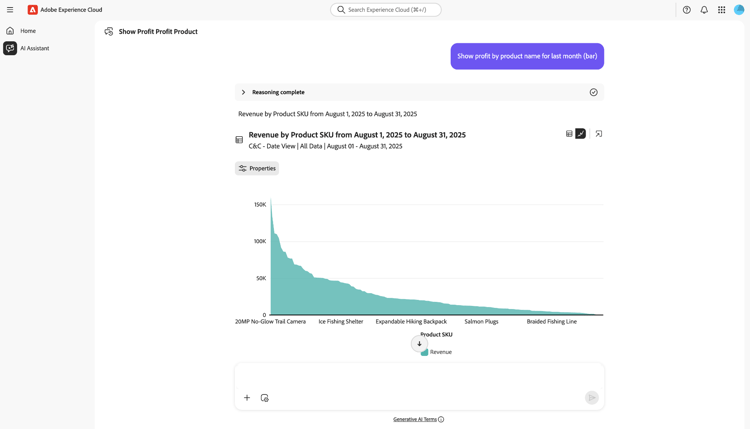
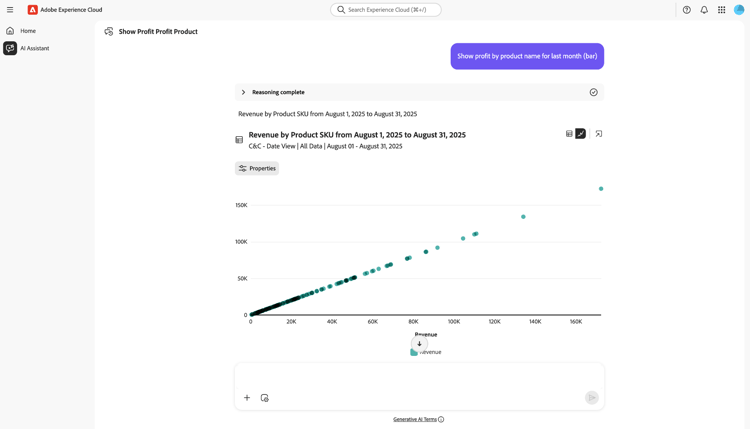
Next, select Properties to change your graph type and configure values for your X and Y axis.
AI Assistant supports several graph types for data visualization. You can interact with all types of graph by hovering over the data.
To view a line graph, select Properties and then select Line.
To view an area graph, select Properties and then select Area.
To view a scatter graph, select Properties and then select Scatter.
To view a donut graph, select Properties and then select Donut.