Quick Start: Spin Sets quick-start-spin-sets
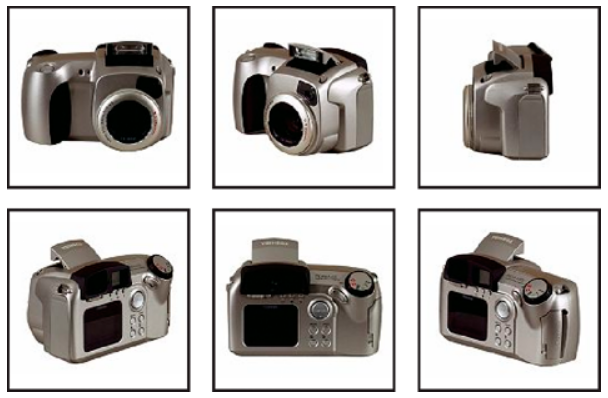
A Spin Set provides a 360-degree view of an object. Spin Sets make it possible to view items from any angle, obtaining visual details from any perspective. A Spin Set simulates a 360-degree viewing experience. Adobe Dynamic Media Classic offers one-dimensional Spin Sets in which viewers can rotate an item, and two-dimensional Spin Sets in which viewers can rotate and flip the item. Moreover, users can zoom and pan any of the views. Users can examine an item more closely from a particular viewpoint.
Spin Sets also accept Image Maps. An Image Map is a region on an image within the spinning set that displays a rollover panel with text. When the user selects an Image Map, an action is triggered. For example, a web page is launched so that the user can learn more about a product. To indicate an Image Map in a Spin Set, an outline appears around the Image Map itself when the user moves the pointer over it.
See Create Image Maps.
See Image and Spin Sets: Dynamic Imaging training video.
When you create a Spin Set, Adobe recommends the following guidelines and enforces the following limits:
See also Dynamic Media limitations.
This guide is designed to help you begin using Spin Set techniques in Adobe Dynamic Media Classic quickly. Follow steps 1 through 7. At the end of each step, you can select a topic link to learn more.
1. Create and upload the images
At minimum, you need 8-12 shots of an item for a one-dimensional Spin Set and 16-24 for a two-dimensional Spin Set. The shots must be taken at regular intervals to show the item rotating and being flipped. For example, if a one-dimensional Spin Set includes 12 shots, rotate the item 30° (360/12) for each shot.
On the Global Navigation bar, select Upload to upload spin images from your computer or network to Adobe Dynamic Media Classic.
See Guidelines for shooting Spin Set images.
2. Create a Spin Set
To create a Spin Set, on the Global Navigation bar, go to Build > Spin Sets. In the Spin Set Size dialog box, choose how many rows and cells you want, and select OK. Then drag the images into the grid on the Spin Set page.
See Create a Spin Set.
3. Edit a Spin Set
To edit a Spin Set, on the Global Navigation bar, go to Setup > Viewer Presets. Select a Spin Set, and then select Edit. Add, remove, and change the position of images. You can change the position of rows in two-dimensional Spin Sets.
See Edit a Spin Set.
4. Set up Spin Set Viewer Presets
Administrators can create Spin Set Viewer Presets. These presets determine the look of the Spin Set Viewer. To set up a new Spin Set Viewer Preset, on the Global Navigation bar, go to Setup > Viewer Presets.
On the Viewer Presets page, click Add, then select Spin Set Viewer from the drop-down list, and then select Add. Choose options on the Configure Viewer page, then click Save.
5. Preview a Spin Set
Select your Spin Set in the Browse panel, and then click Preview. On the Preview page, hold down the button and drag the pointer left or right to rotate the item visually.
See Preview a Spin Set.
6. Publish a Spin Set
Publishing a Spin Set places it on Adobe Dynamic Media Classic servers so it can be dynamically delivered to your website or application. It also activates the URL string that calls the Spin Set from Dynamic Media Image Servers to your website or application.
To publish a Spin Set, mark it for publishing by selecting the Mark for Publish icon beside its name in the Browse panel. On the Global Navigation bar, click Publish to initiate publishing. On the Publishing page, click Submit Publish.
See Publish a Spin Set.
7. Link a Spin Set to a webpage
Adobe Dynamic Media Classic creates URL callout strings for Spin Sets, and activates them after you publish them. You can copy these URLs from the Preview page.
Select the Spin Set, and then click Preview. Select a Spin Set Viewer Preset. Then click Copy URL.
See Linking a Spin Set to a webpage.