Approval approval
The Approval workflow activity allows you to assign a task to a group or an individual operator, customize the notification email title and message, and define the possible answers (for example Yes/No) as output branches.
Use this activity whenever a step in your workflow requires a human decision before continuing, for example to get sign-off on a budget, a target audience, or content, before the workflow proceeds.
How the approval process works process
It requires the participation of at least one operator. This activity does not block the workflow: other tasks can run while the workflow waits for a reply.
While waiting for an answer, the activity is shown as pending on the canvas. The assignee responds using the link included in the notification message.
Here is the approval task process:
- Create a workflow and configure an Approval activity.
- Start the workflow. When it reaches the Approval activity, a task is created for the assignee.
- The assignee receives the notification message, clicks on the link and selects an answer.
- Once the assignee replies, the workflow continues through the transition matching their answer.
To configure this activity, follow these steps:
Assign the task assignment
Assigning the task to a group or an operator is mandatory: a warning is displayed until you do so.
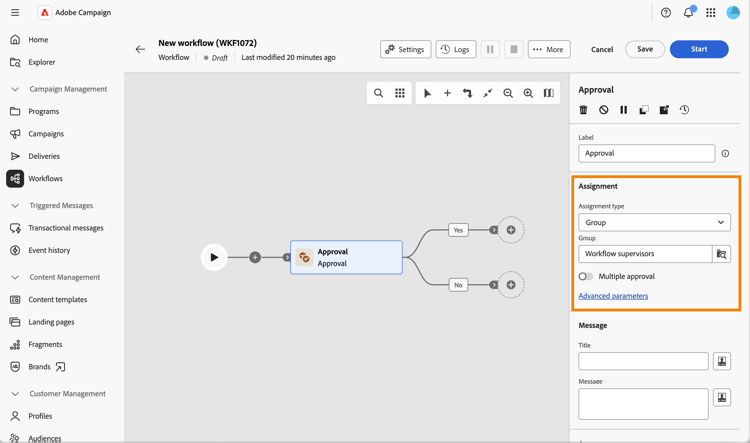
Follow these steps:
-
In the Assignment type field, choose whether the task is assigned to a Group (default) or an Operator.
-
Then select the Group (of operators) or an Operator (single operator).
-
Enable Multiple approval if you want every assignee to reply before the workflow continues. This option is available regardless of the assignment type. When disabled, the workflow continues as soon as any one assignee replies, and that reply is the one taken into account.
-
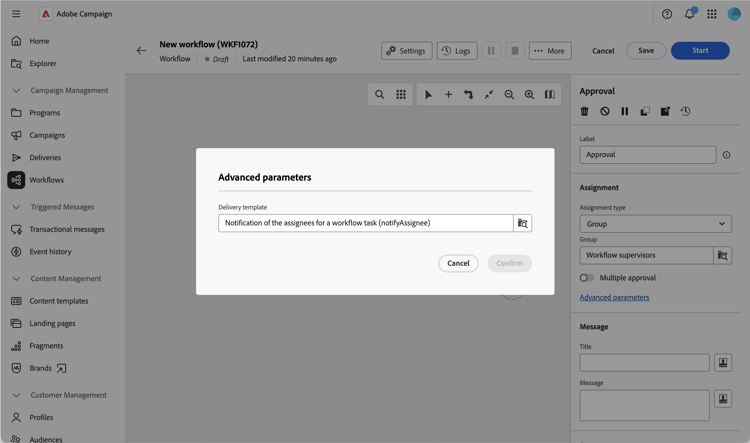
Click Advanced parameters to select the delivery template used for the notification. By default, a built-in template is used, but you can select any other delivery template.
Define the notification message message
You can now define the notification message sent to the assignee.
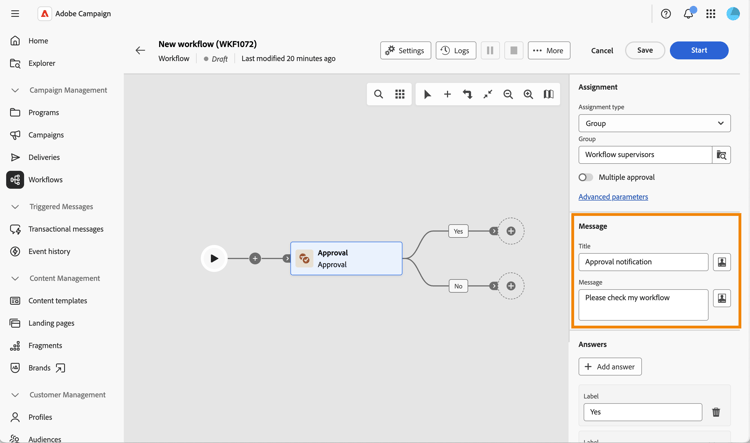
Follow these steps:
-
Define the Title of the notification sent to the assignee.
-
Define the Message of the notification sent to the assignee.
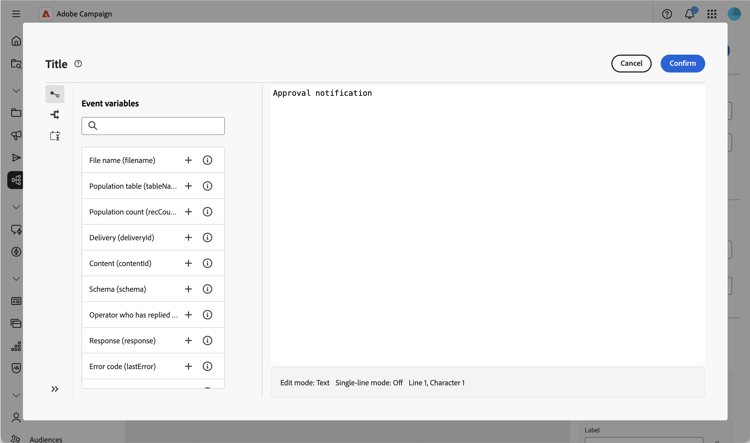
Both fields support personalization: click the personalization icon to insert event variables, such as the Operator who has replied and the Response, which you can reuse elsewhere in your workflow.
Define the possible answers answers
The activity comes with two default answers, Yes and No. Each answer corresponds to an output transition on the canvas.
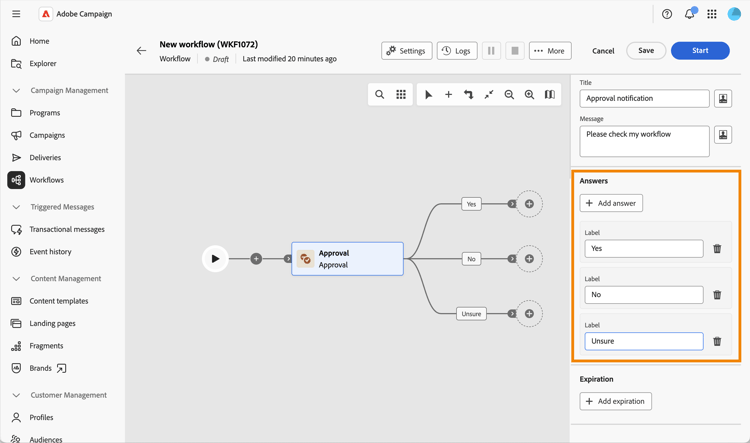
Click Add answer to define additional choices.
When the assignee answers, the workflow continues through the transition matching their choice.
Define an expiration expiration
Finally, you can define an expiration for the approval task. Like an answer, an expiration triggers its own output transition if the assignee has not replied by the deadline.
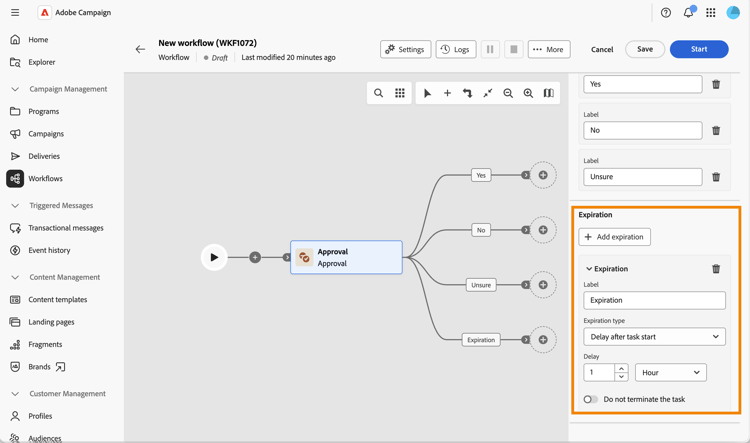
-
Click Add expiration.
-
Define a Label for the corresponding output transition.
-
In the Expiration type drop-down, choose one of the following options:
- Delay after task start: Define a delay to wait after the approval task starts.
- Delay after a date: Define a delay to wait after a specific date.
- Delay before a date: Define a delay to wait before a specific date.
- Expiration calculated by script: Use a script to calculate the expiration.
-
Enable Do not terminate the task if you want the expiration transition to be activated without ending the approval task, so the assignee can still reply afterwards.
You can define multiple expirations for the same approval task.
You can then start the workflow. Once the assignee replies, the workflow continues through the transition matching their answer. Read more