Read an audience
Objective
In the next set of steps you will create a campaign to read an audience from AEP and use it along with the Profile Target Dimension created earlier. Use the Split activity to split the data based on a condition. Finally test the campaign to understand how these audiences work when used with the Relational schema.
Read audience
This lab covers using the Read audience activity in conjunction with the Relational schema for enrichment.
Orchestrated Campaign uses the Relational schema for all the activities. When using the Read audience activity, which reads the audience from AEP, a corresponding Entity (Target Dimension) should be configured to reconcile the audience with the Campaign Target Dimension.
Create a campaign
-
In the left side rail, click on Campaigns

-
Click on Create campaign

-
Select Orchestration - Marketing and click on Confirm

-
Provide Campaign details as follows and then click the Save button
- Name: OC-RSL-ReadAudience-Test
- Description: RSL-Read Audience Test

-
Wait for the confirmation message

Add Read audience activity
-
Click on the + inside the canvas to open the options menu and then select Read audience from the Targeting activities

-
In the Read audience details pane, click on the Search icon for Audience

-
Select the dep: Basic Plan Members audience with Profile Count of 9 and click on Add audience

-
Next click on the drop down for Entity and select the
dep-rel: Customer Account - customer_idCampaign Target Dimension

Test the campaign
-
The settings for the Read Audience activity are filled in. Click on Start to run the campaign in Test mode

note NOTE This takes a few minutes to run. Test mode permits the execution of the campaign to verify and monitor its behavior along with the results from each activity. The activities get executed sequentially through to the end of the canvas. -
The test execution starts and the results are displayed when completed. Click on the Result node and then Preview results to see the execution results

-
Notice that 2 (out of 9) profiles from the Read audience do not have a corresponding matching Target dimension from the relational schema (i.e. they exist in the Profile store but not the relational store). And since Orchestrated Campaign works off the Relational schema, the unmatched
customer_id(2) from the Read audience is dropped and only the matching ones, 7 in this case, are usable in subsequent activities that leverage relational data in the campaign
note NOTE The following steps use the relational data to confirm the above statement of unmatched customer_idgetting dropped. -
Click on Stop to stop the Test mode of the campaign

-
Click on the + at the end of the flow and add Split from the Targeting activities

-
In the details pane of the Split activity, expand the first split called Subset

-
Rename it to “In Store” and click on Create filter to set the filter condition

-
In the Create filter pane, click on Add condition

-
Since no other attributes were extracted from the AEP Profile, the only AEP Profile attribute available here is the
Customer ID. However, columns from the relational store corresponding to the matching Target dimension are available for setting up the filter condition. Expand the Targeting dimension by clicking on >
-
Select
Sourcefrom the list and click on Confirm

- The distinct values for the Source column are available in the drop down. For the Custom condition, select “In Store” from the drop down and click on Confirm to exit

- Back in the details pane of the Split activity, the settings for the first Split are complete. Click on Add segment to the second split

A new segment with the name Result is created
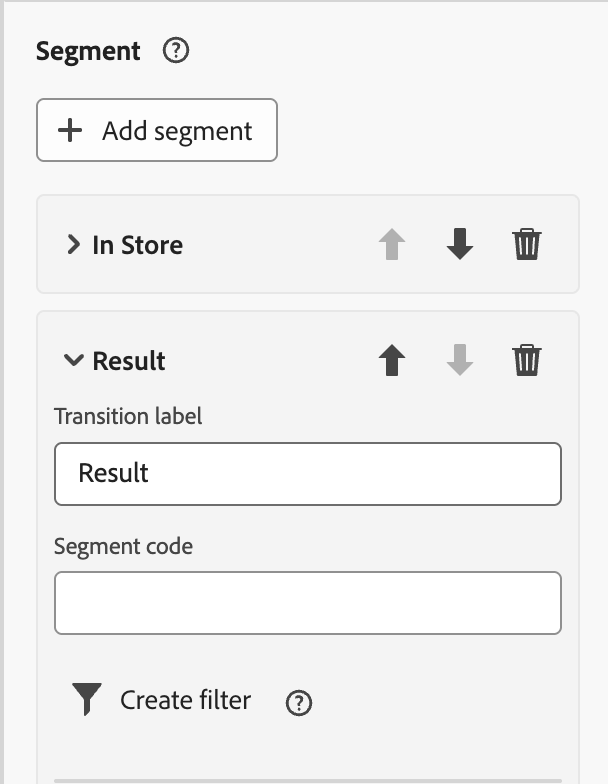
- Rename “Result” to “Not In Store” and click on Create filter to set the filter condition
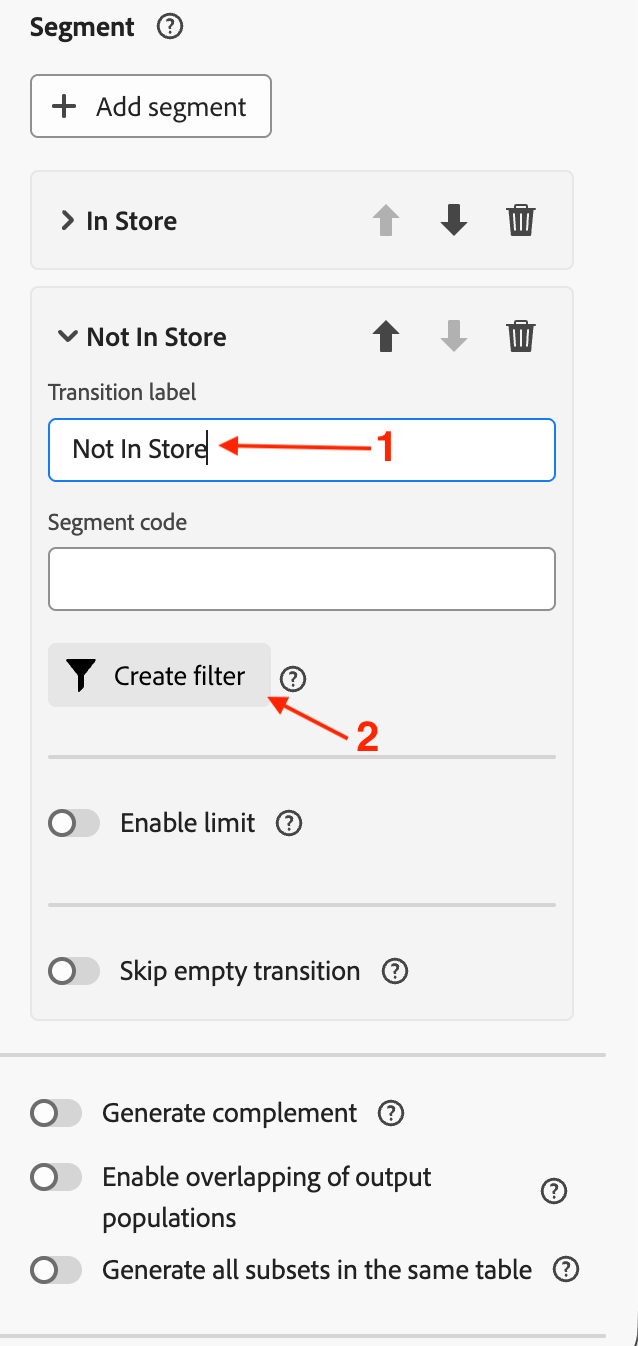
- In the Create filter pane, click on Add condition. Follow the same approach as above, expand the Targeting dimension by clicking on >, then select
Sourcefrom the list and click on Confirm
- For the Custom condition, select “In Store” from the drop down and for the operator select “not equal to”. Click on Confirm to exit

- Back in the details pane of the Split activity, the settings for the two Splits are complete. Click on Start to run the campaign in Test mode

- The test execution begins and the results are displayed upon completion. Since only 7 matching Target dimension were found in the Relational schema, the same count is observed post the Split operations (7 and 0) as well

- Click on each result box and Preview results to view the results

- Click on Stop to stop the Test mode of the campaign

Source set to “In Store”, which was evident via the Split flows.Recap
You have now seen how easy it is to create a Campaign, perform a Read Audience activity along with the Profile Target Dimension to use the relational schema. You used the Split activity to split the audience based on a condition. Finally, the test mode helped understand that it is important to have the data consistency between the Profile and the Relational schema.
You can read more here if you are interested.