Profile Target Dimension
Objective
In the next set of steps you navigate the UI to view the Schema and set up the Identity. Next, you set up the Profile Target Dimension, which is the entity type the campaign is targeting and reconciling with the AEP Profile for delivery.
Why this configuration is important
The Profile Target Dimension is used to tell Adobe Journey Optimizer how data between the Real-Time Customer Profile and Relational Store can be joined. The components of this configuration are as follows:
- A relational schema
- A single field from the relational schema
- An identity namespace associated to that field
Label the Identity
-
Click on the Apps icon and select Journey Optimizer

-
Click on Schemas under the Data Management menu and make sure you have the Browse tab selected.
-
Search for the schema called
dep-rel: Customer Account
-
Open the schema by clicking on its name and then click on the field customer_id

-
In the right rail locate the checkbox named Identity, check the box and choose the Identity namespace titled customerID
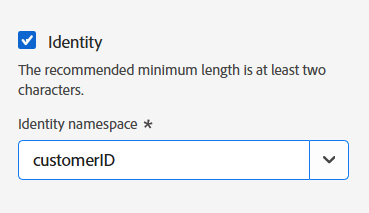
-
Click the Save button to save your schema. A confirmation message shows up
-
Click on Cancel button or the Schemas in the left-hand rail to exit the schema UI
Create the Profile Target Dimension
-
Click on Configurations under Administration

-
Select Profile Target Dimension and click on Manage

-
The Profile Target Dimension pane opens, click on Create

-
Select the schema
dep-rel: Customer Accountfrom the drop-down.note NOTE It might take a few minutes for the schema to appear in this screen after marking the identity. Refresh the page and repeat the previous two steps until the schema appears. 
-
For the Identity value select
/customer_id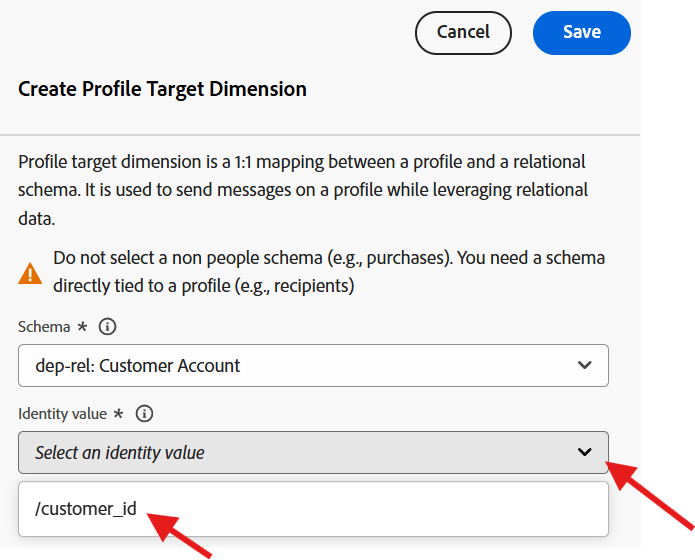
note NOTE A relational schema can have many fields labeled with identities hence this being a list box. -
Click the Save button to create the Profile Target Dimension. You then see the record appear.

Recap
You have now seen how easy it is to navigate the Schema, mark an attribute as an Identity and create the Profile Target Dimension.
You can read more here if you are interested.