A practical guide to eliminating flicker in personalization, covering Adobe's native pre-hiding tools in alloy.js and at.js, the new Flicker Management V2 feature, and custom code techniques for teams building personalized experiences outside the Target UI.
Flicker in personalization is the brief moment when visitors see the default content before the personalized experience is displayed. After 12 years of consulting, I find it a little ironic that flicker remains one of the most persistent challenges in personalization. Even with modern tools and implementation patterns, delivering experiences that feel seamless to users is not always straightforward. In this article, I will go deeper into the topic of flicker-free personalization in two parts. First, I will cover what Adobe provides out of the box to help reduce or prevent flicker. Second, I will explore practical custom approaches used today that align with implementation best practices and help teams create smoother, more polished experiences.
OOTB pre-hiding
Adobe has always provided solid flicker control mechanisms for personalization solutions such as Adobe Target. Both alloy.js, commonly referred to as Adobe Experience Platform Web SDK, and at.js offer pre-hiding configurations. Pre-hiding works by temporarily applying a CSS stylesheet with hiding rules while the personalization call is in progress. There is also a configurable timeout for rare edge cases to ensure elements are never hidden permanently. For synchronous loading of the above JavaScript libraries or your Tag libraries containing those libraries, pre-hiding is configured with the following options.
prehidingStyle: "#container { opacity: 0 !important }"
});
Or its equivalent if using Web SDK Tags extension
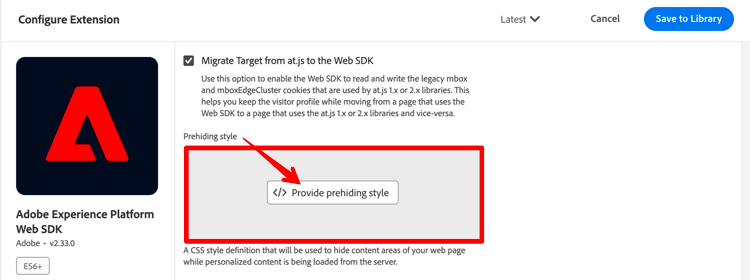
If you are unsure which elements will be personalized, you can hide the entire body body { opacity: 0 !important }. This is still the most common option among customers. Keep in mind that this option may slightly affect your web vitals score, but choosing between a better user experience or insignificant performance change is often in favor of the better user experience in most cases.
The legacy at.js library uses a similar configuration for pre-hiding inside the targetGlobalSettings object.
bodyHidingEnabled: true,
bodyHiddenStyle: "body { opacity: 0 !important }"
};
Or its equivalent if using Adobe Target V2 Tags extension
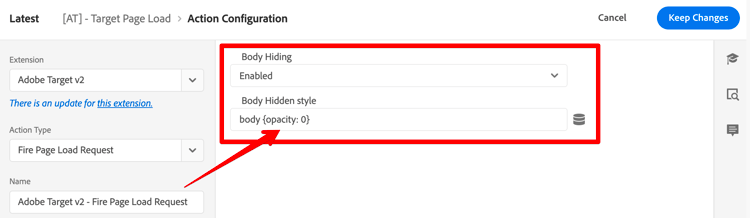
With these configurations in place, let’s look at what happens during page load:
1. The HTML page loads.
2. The Web SDK alloy.js library is initialized.
3. The configured pre-hiding stylesheet is temporarily inserted into the HTML <head>, hiding either the entire body or selected elements.
4. The Web SDK /interact call retrieves Target experiences.
5. alloy.js reads the CSS selectors from the modification actions and hides those elements by selector.
6. The initial body-level (or selected-element) pre-hiding is removed, leaving only the modification-action selectors in place.
7. DOM manipulation takes place.
8. The modification-action selectors are removed, revealing the personalized elements.
OOTB pre-hiding for asynchronous loading
When JavaScript libraries are loaded asynchronously, default content is usually exposed before flicker control takes action. Adobe provides a pre-hiding code snippet that needs to be placed into the <head> of your HTML document. The pre-hiding code snippet replicates the same functionality as pre-hiding configuration options in alloy.js and at.js - content will be temporarily hidden with CSS hiding rules and configurable timeout.
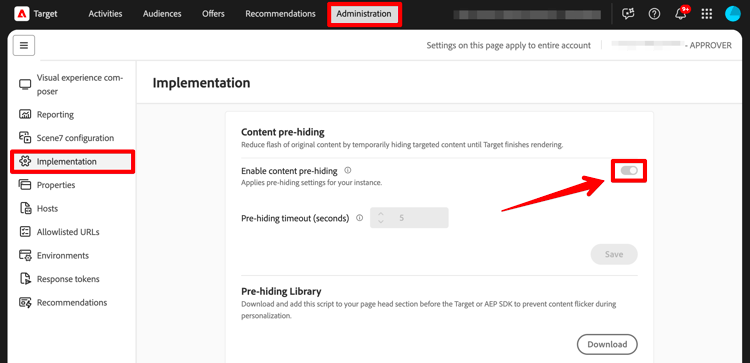
Now let’s come back to hiding an HTML body vs selected DOM elements for a moment. Until recent times, it was difficult to come up with a scalable solution to pre-hide only personalized elements. You would usually manage them manually in your Tags or have some other partially automated means that still require manual input. All that changes with the new Flicker Management V2 - a new feature from the Adobe Target team released in 2026. The all-new Flicker Management V2 preloads CSS selectors extracted directly from Target activities, specifically Visual Experience Composer modification actions, thus allowing to pre-hide only those elements that are indeed personalized. Furthermore, you can manage it at the activity level allowing to enable or disable pre-hiding, so you are in full control of the feature that requires minimal effort to implement and is entirely automated. Enabling Flicker Management V2 can be done under the Administration page in the Target UI inside the Implementation tab, and then further enabling when building each activity.
Custom pre-hiding
This so far concludes part one describing Adobe’s out of the box pre-hiding options. It’s plenty to get you covered for most cases. However, we know that in reality things may get more complicated. There are use cases where we use custom code and we might not be able to easily take advantage of available built-in options. If you are building your personalization experiences using code, you are in control of handling the flicker on your own. You may pre-hide the elements and reveal them as needed right there in your JavaScript logic that you add to each experience’s Offer. Be aware that the personalization calls are asynchronous in nature and knowing when to apply your code to existing elements may be a tricky task because we do not know when exactly they become available in the DOM.
<script>
(function() {
function removePrehide() {
var style = document.getElementById("target-prehide");
if (style) { style.parentNode.removeChild(style); }
}
setTimeout(removePrehide, 3000); //Failsafe: remove prehide after 3 seconds
// DO ANY DOM CHANGES AS NEEDED...
})();
</script>
One reliable solution for custom code experiences that help you detect the appearance of DOM elements in the most performant way is called Flickerlessly. I designed it a while back to address a challenge of waiting for DOM elements to be present on the page to apply further changes. The old known JavaScript functions setTimeout or setInterval were poor approaches as they would drain your device resources. The MutationObserver was a better move but it may still be heavy on the DOM in my opinion. Flickerlessly was built around the CSS keyframe animation technique for triggering the callbacks and this is a highly efficient approach to reliably and performantly detect the very moment of DOM elements being present on the page.
selector: '.a, .b',
success: function (el, log) {
log('Detected element', el);
}
});
Or its equivalent if using Flickerlessly Tags extension
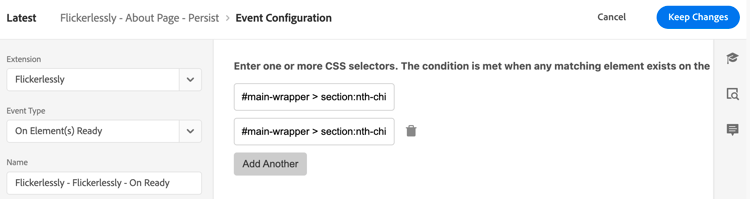
The Flickerlessly has been open-sourced and is available on GitHub here. There is even a Data Collection Tag extension if you prefer to avoid managing custom code in your Tag libraries.
Choosing the right pre-hiding approach
Let’s summarize what we have covered. For synchronous client-side implementations, both alloy.js and at.js offer a configurable option to pre-hide personalized elements secured by a timeout. When asynchronous implementation is used, the pre-hiding code snippet is placed in the <head> of HTML document to pre-hide personalized elements. Both approaches are officially a part of the product and follow Adobe’s best practices. You can choose to hide individual elements or the entire body. If the body is hidden, the user experience tradeoff is often acceptable, because Adobe Edge calls typically complete very quickly. The new Flicker Management feature allows automatically pre-hiding only individual elements so there is no more need to decide whether to manage hiding rules individually or hide the entire body. And finally, your own Target Offers can use any custom code to handle pre-hiding however you need. The Flickerlessly mini library, which is also available as a Tag extension, can help reliably detect elements appearing in the DOM.
With this knowledge, you should be able to address all your flicker-free personalization needs. Make sure to explore all described approaches in detail.