Auto-start workflows auto-start-workflows
Standard asset processing doesn’t cover every business need, such as a custom approval step or a notification tied to a specific asset type. Auto-start workflows close this gap: AEM triggers your custom workflow automatically, right after it finishes processing an asset from an upload or a reprocess job. This adds business logic to asset processing without any extra steps for the person who uploads the file.
| embed |
|---|
| https://video.tv.adobe.com/v/37323?quality=12&learn=on |
https://video.tv.adobe.com/vc/37323/eng.json
| note |
|---|
| NOTE |
| Use auto-start workflows to customize asset post-processing rather than workflow launchers. Auto-start workflows only run once an asset finishes processing, while launchers can run multiple times during processing. |
Customize the post-processing workflow
To customize the post-processing workflow, copy the default Assets Cloud Post-Processing workflow model.
-
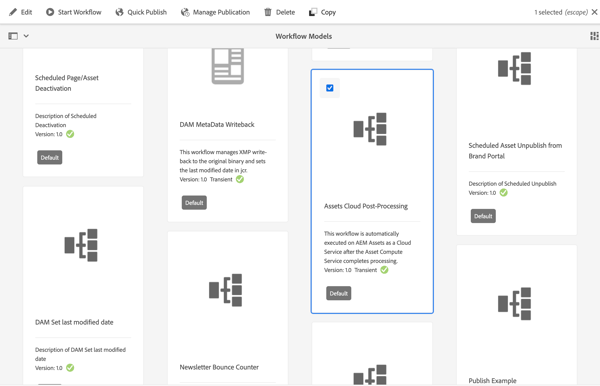
Start at the Workflow Models screen by navigating to Tools > Workflow > Models
-
Find and select the Assets Cloud Post-Processing workflow model
-
Select the Copy button to create your custom workflow
-
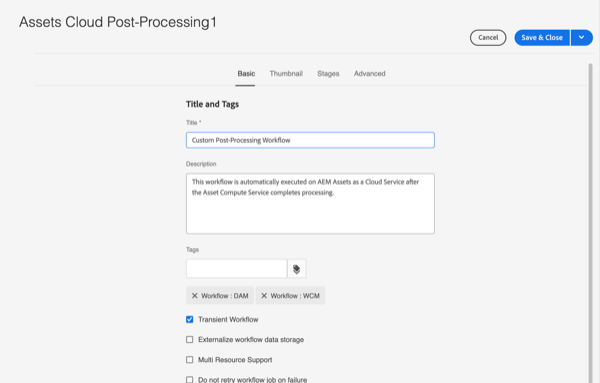
Select your new workflow model (which will be called Assets Cloud Post-Processing1) and click the Edit button to edit the workflow
-
From the Workflow Properties, give your custom post-processing workflow a meaningful name
-
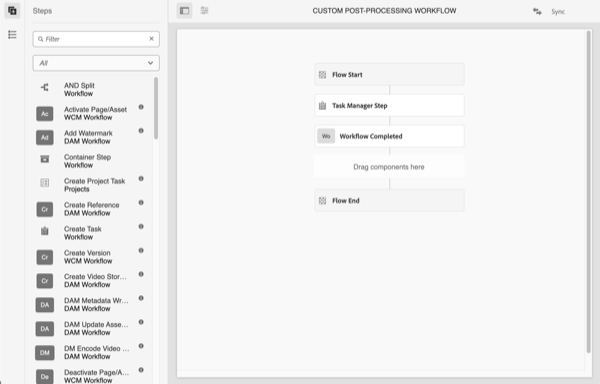
Add the steps to meet your business requirements, in this case a task when assets finish processing. Make sure that the last step of the workflow is always the Workflow Complete step
note NOTE Auto-start workflows run with every asset upload or reprocess, so consider the scaling impact of workflow steps carefully, especially for bulk operations such as Bulk Imports or migrations. -
Select the Sync button to save your changes and synchronize the Workflow model
Use a custom post-processing workflow
Custom post-processing workflows are configured on folders. To configure one on a folder:
- Select the folder for which you want to configure the workflow and edit the folder properties
- Switch to the Asset Processing tab
- Select your custom post-processing workflow in the Auto-start Workflow selection box
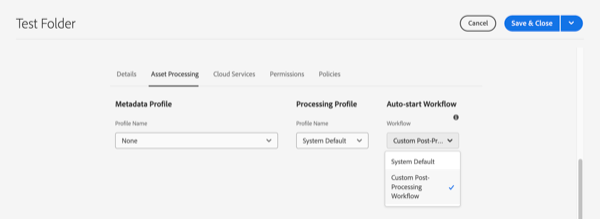
- Save your changes
Your custom post-processing workflow now runs for every asset uploaded or reprocessed under that folder.