Configure custom action
Learning objective
Create a custom action that defines how the journey communicates with an external endpoint or service to get an ETA for when the package arrives.
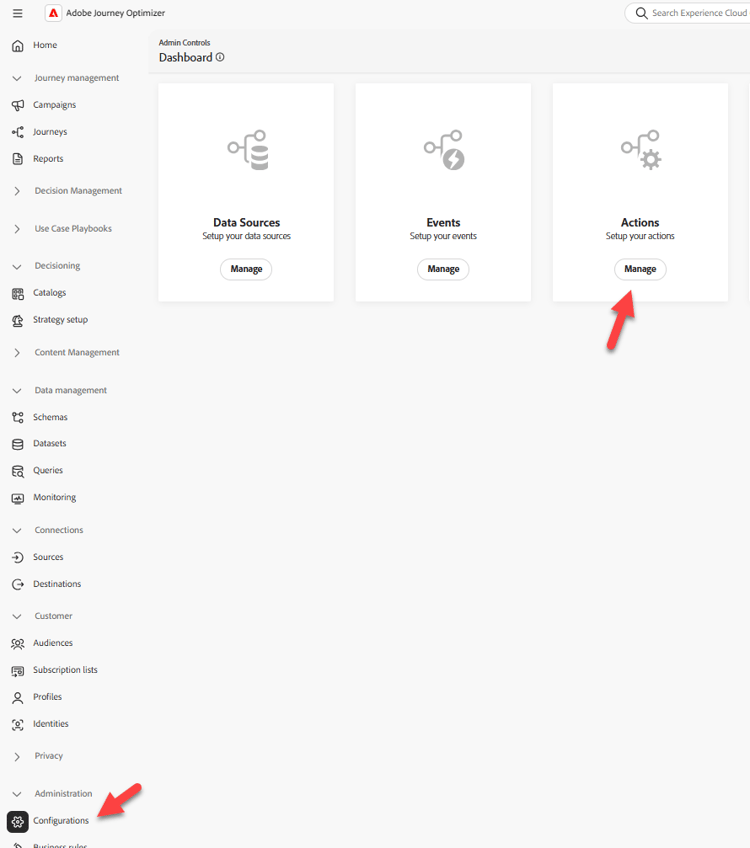
Navigate to actions
In the left rail under the Administration menu click to Configurations and then on the Actions tile click the Manage button
Configure the action
Action name & details
-
In the upper right click on the Create Action button

-
In the configuration panel that appears update the following basic values as shown below:
- Name:
GetShippingDetails - Description:
Call third party to get Shipping ETA and Tracking Number - Action Type:
Custom - Channel:
Email - Required marketing Action:
Email Targeting
- Name:

Endpoint details
In the Endpoint configuration area provide the following details:
-
Endpoint URL:
https://api.mockaroo.com/api/67077bb0?count=1&key=a0dbce20 -
Method:
GET -
Headers: leave as-is
-
Query parameters:
- Name:
orderid - Type:
variable
- Name:
- Authentication Type:
No Authentication


Response payload details
Now you need to provide a sample payload so the action knows what the response payload looks like.
-
In the Payloads area click on the Pencil icon to open the Field configuration screen


-
Copy and paste the below payload into the Payload box
code language-json { "eta": "11/19/2025", "tracking_number": "072000326" }note NOTE This is the same JSON structure that the Mockaroo endpoint above should return: -
The response payload displays. Click the Save button.

Test the action
-
Click the Send test request button in the bottom right rail to confirm your configuration works correctly
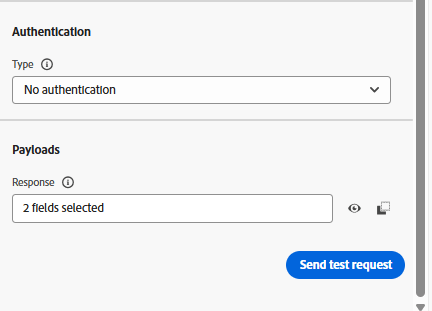
-
Click on the Query parameters tab and update the value for
orderIdto 123
-
Click the Send button and if all works out well you should see a response code of 200 and a Preview of the payload as shown below…

Preview
code language-json { "eta": "12/26/2025", "tracking_number": "063112249" }note warning WARNING If you are not seeing a 200 response or a Preview, do not continue. Ask your facilitator for help. -
Click the Cancel button to go back to the Action screen and then scroll back up in top right rail and click the Save button
Recap
A reusable custom action configured in Adobe Journey Optimizer that takes an Order ID and returns the ETA and Tracking Number.