Build journey
Learning objective
Create a unitary journey that begins with the configured Order Shipped event, gets the ETA from an external service and sends an email.
Create journey
Go to Journeys and click Create Journey - Create from scratch

Journey properties
-
Update the Journey Properties in the right rail with the following:
-
Name:
Order Shipped Journey -
Description:
Notify customer that order has shipped. Include shipping details. -
Tags:
Default -
Journey metrics: leave blank
note NOTE Empty Drop Down? Don’t worry and move on. The very first journey created in a sandbox needs to “prime the pump”. Once we publish the journey, this drop down will have options to choose from. -
Allow reentrance:
checked -
Reentrance wait period:
5 minutes -
Access labels: leave blank
-
Time Zone:
Your Local timezone -
Use Profile time zone in waits and conditions:
NOT checked -
Start/End Date: leave blank
-
Timeout or error:
30 -
Capping rules: leave blank
-
Priority:
0
-
-
If everything looks good click the Save button

Journey canvas
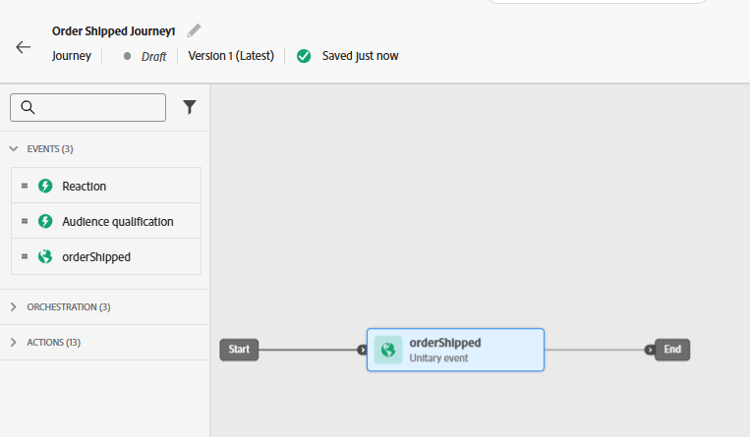
Add a unitary event
From the left pane under the Events menu drag 'n drop the orderShipped event onto the canvas as shown below

Add a custom action
-
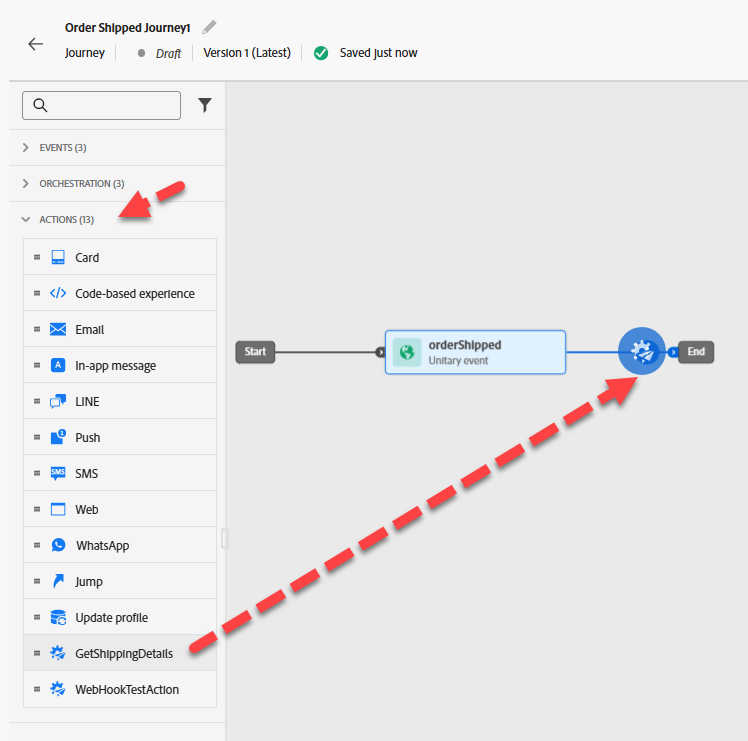
If the left pane expand the Actions menu and then drag 'n drop onto the canvas the action you built named GetShippingDetails after the orderShipped event
-
In the right rail, under Access and privacy configuration --> Marketing Action drop-down ensure the value is set to None

-
Under the Endpoint configuration --> Query Parameters menu click on the Pencil icon next to orderid

-
In the modal that appears expand Context -> orderShipped -> Order and then select Order ID (orderID) and click OK

-
Back in the right rail, ensure the option for Timeout or error is unchecked and then click the Save button

Add email action
-
Under the Actions menu drag 'n drop the Action action onto the canvas after the GetShippingDetails action

-
Select Email for the marketing action, then Add.

-
In the right rail, click Configure action

-
set Email channel Configuration to
Profile-Emailand then click on Edit Content

Add email body content
For content, you are going to keep things simple. Like stupid simple.
-
Update the Subject line to
Order Shippedand then click on the Edit email body button
-
In the top bar click on the Design from Scratch content block

-
From the left bar under the Structure container drag 'n drop the 1:1 Column onto the canvas

-
Then under the Contents container drag 'n drop the Text component into your 1:1 Column

-
Click into the Text component and delete the current text and then click the Add Personalization icon

-
In the left rail click on the Contextual Attributes folder and then navigate thru Journey Orchestration -> Actions and select GetShippingDetails

-
In the main body of the email now copy & paste the below JSON into the Personalization editor
code language-json {{profile.person.name.firstName}}, your order has shipped ETA: Tracking Number: -
Add the personalization fields as follows (click the plus ‘+’ sign next to the field on the left rail):
- ETA:
eta - Tracking Number:
tracking_number

note NOTE Click the + symbol to add personalization attributes from the rail to the canvas. It will place them where your cursor is so ensure you are “lined up” appropriately note NOTE Your email will use a combination of context attributes (ETA & tracking number) and Profile attributes (first Name). If you wanted to add other Profile attributes, you can click on the Profile Attributes tab and select anything you see. 
- ETA:
-
On the bottom of the screen click the Validate button and ensure you have no errors

-
If everything looks good click the Save button in the top right
-
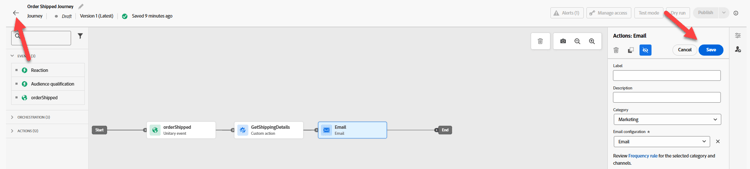
Then click the Save button again in the top right and click the <- left arrow in the top left

- Finally, click the < Back icon in top left to get back to the Journey Canvas

Override email parameters
Back on the main Journey Canvas, on the Email node, make sure you can see the read-only fields (you may need to click on the Show read-only fields icon)

-
Scroll down to Email Parameters and click on the Enable parameter override icon

-
Click in the empty text box and then in the left rail drill down into Context -> orderShipped -> _dep and click on the personalEmail field. Then click the OK button

note warning WARNING This is a dangerous thing to do so avoid using it unless you need to in a production setting. This will override the default location that Journeys looks for on the profile to execute messages. -
Click the Save button in the top right and then click the back arrow <- in the top left to close the Journey
Recap
A published journey capable of responding to the Order Shipped event trigger, get the ETA from an external service and send an email.