Create an Orchestrated Campaign
Objective
In the next set of steps you create the shell of an Orchestrated Campaign (no activities) which is the starting point for any campaign.
Navigate to campaigns
-
First make sure you are in the Adobe Journey Optimizer application by selecting the app from the apps drawer in the upper right of your browser

-
In the left navigation rail, select Campaigns
-
Then click the button Create campaign in the upper right

-
In the modal that displays select Orchestration - Marketing and the click Confirm

Campaign settings
-
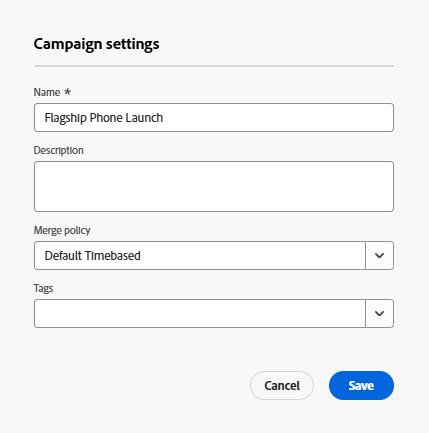
Fill out the required campaign metadata with the following information:
- Name -->
Flagship Phone Launch - Description --> leave empty
- Merge policy -->
Default Timebased - Tags --> leave empty
When done your screen should look like below.
- Name -->
-
Click the Save button to continue.
Understanding scheduling
You should land immediately into the workflow canvas after you create your campaign. Note that in the upper right there is a scheduling option for how often this workflow should run for you campaign.
The default is always set to As soon as possible. For this exercise, we will use the default but there are many other options available to you.

Recap
You have now seen how to create an Orchestrated Campaign and the general options available to you when it comes to scheduling.