Model standard objects
Navigate to schemas
-
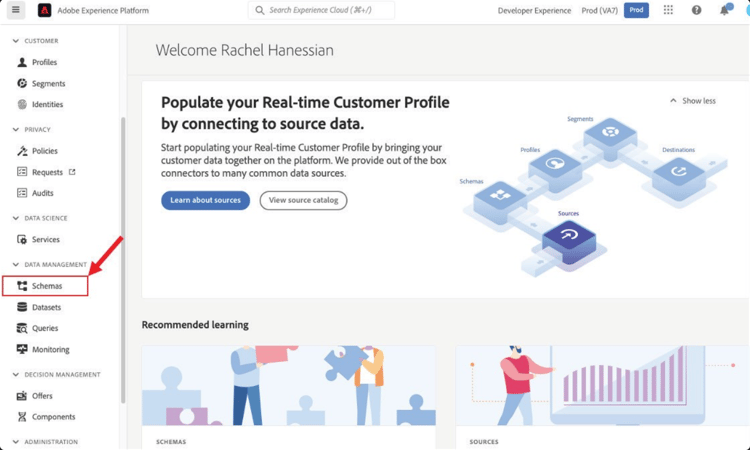
Click on the Schemas tab in the left rail
-
In the top navigation you see options to browse existing schemas as well as view Field Groups and Data Types that are currently in the XDM registry.
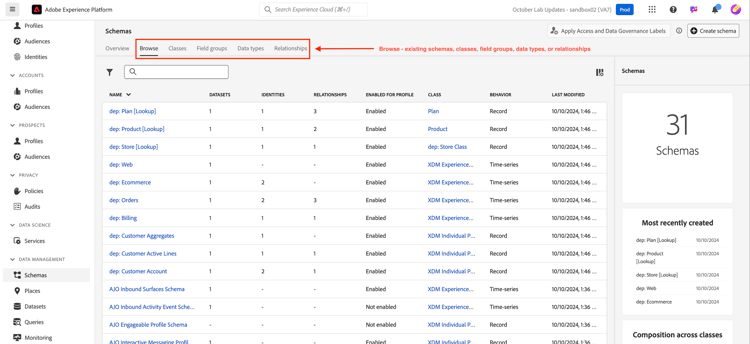
dep), as well as system generated schemas for both Adobe Real-Time CDP and Adobe Journey Optimizer.Create Individual Profile schema
-
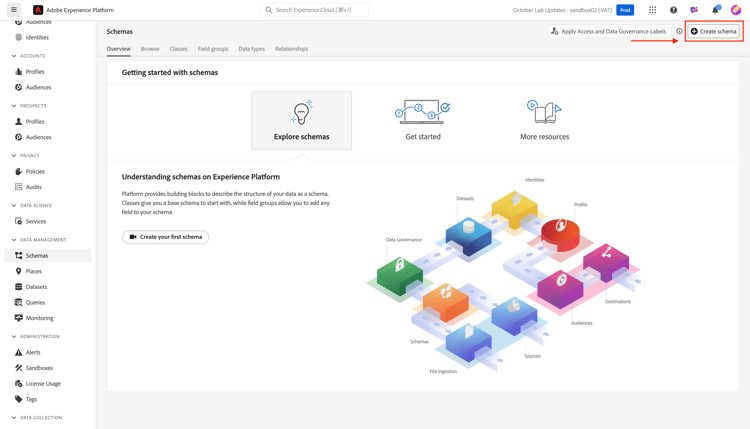
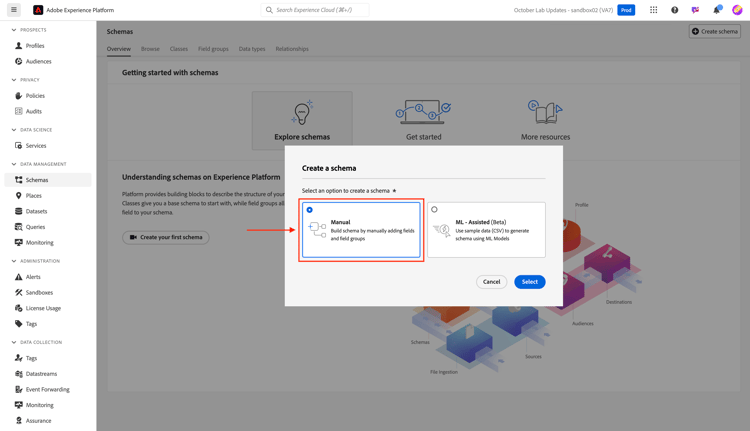
Start by clicking Create schema
-
Select Manual
-
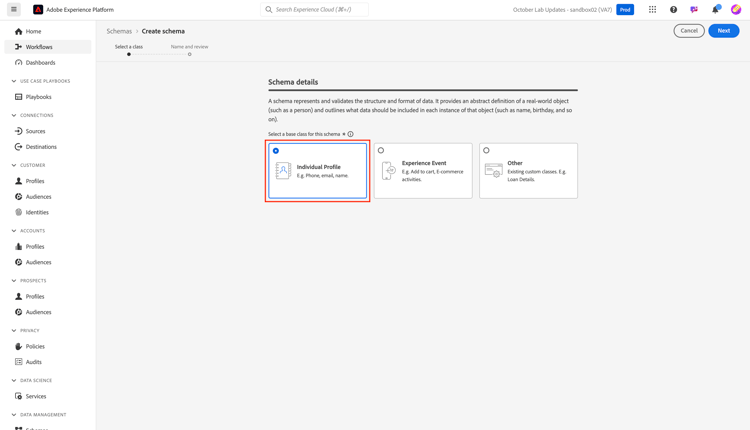
Select Individual Profile
Name your schema
The XDM Individual Profile class-based schemas allow you to collect attributes about an individual that will be stitched to the profile. The class itself contains fields that are not editable such as modifiedByBatchID, PersonID, etc.
-
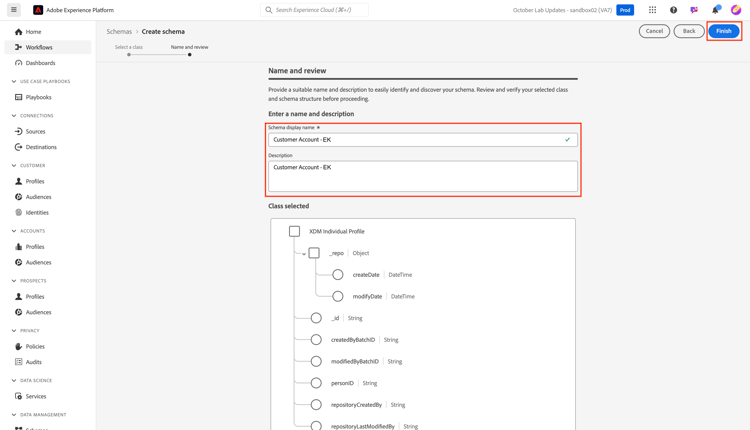
Give your schema a name and description.
- Schema Display Name --> Customer Account – [Your Initials]
- Description --> This schema collects identities, plan information, demographic details, and contact details of an individual.
-
Save your schema using the Finish button on the top right.
Add Demographic Details field group
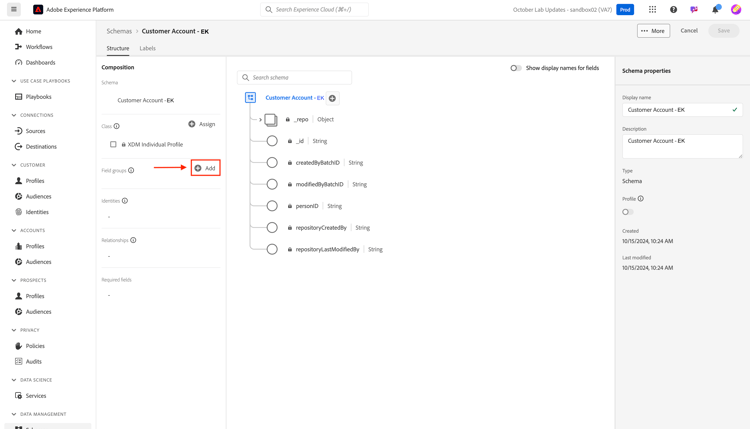
There are many field groups that exist as standard XDM in Adobe Experience Platform for you to add to your schema and customize.
-
Click the + (add) on the left rail in the field group section.
-
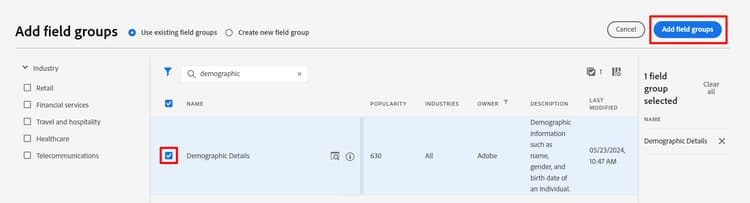
Search for Demographic Details, or find it by browsing the list.
- When you find the field group click on the magnifying glass to the right of the field group to view its structure. This is a useful way to preview what you are about to add to your schema without actually adding it.
- Close the preview when done reviewing


-
Check the checkbox next to the field group and then click the Add field groups button
Add other standard field groups
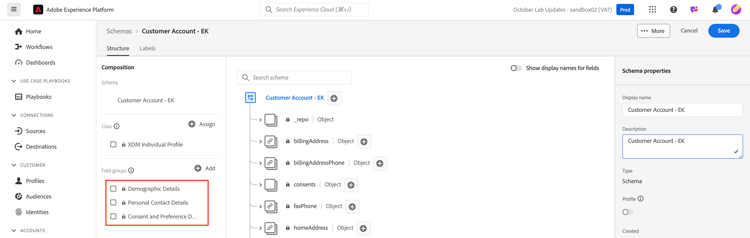
You need to add additional standard field groups to your schema. Repeat the previous steps to add the two additional field groups to your schema:
- Personal Contact Details
- Consent and Preference Details
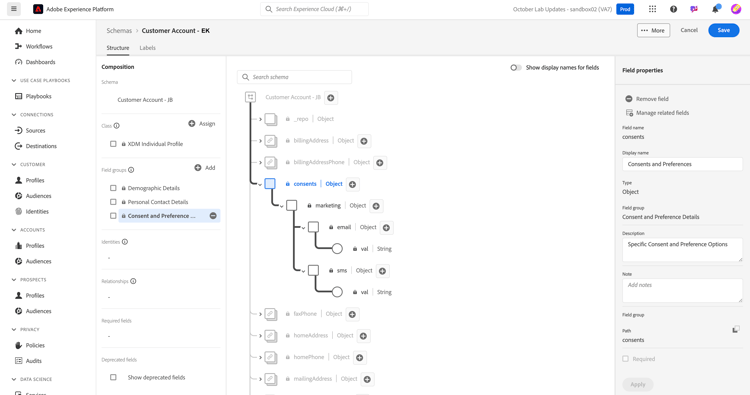
When you are done your schema should look like the below image when done. Be sure to click the Save button and save your work!
Customize standard field groups
Demographic Details field group
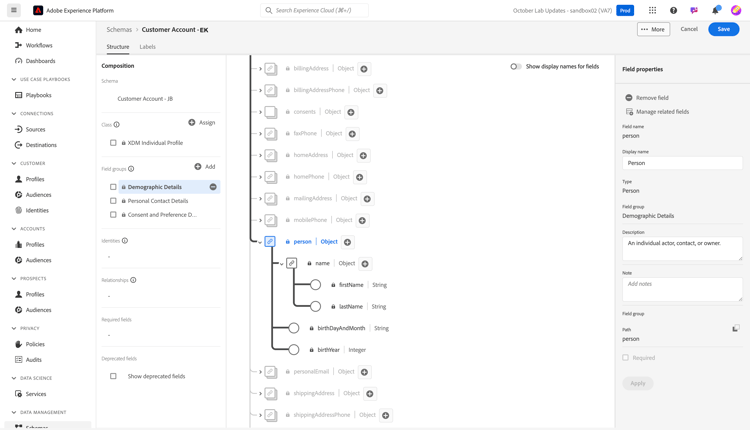
The Demographic Details field group brought in many fields, but based on your schema design from the LID methodology, you only need the following fields:
- person.name.firstName
- person.name.lastName
- person.birthDayAndMonth
- person.birthYear
To remove fields from any Adobe standard field group you can utilize the Manage related fields option. Manage related fields allows you to remove standard fields from your schema, so you are only left with the fields you need.
-
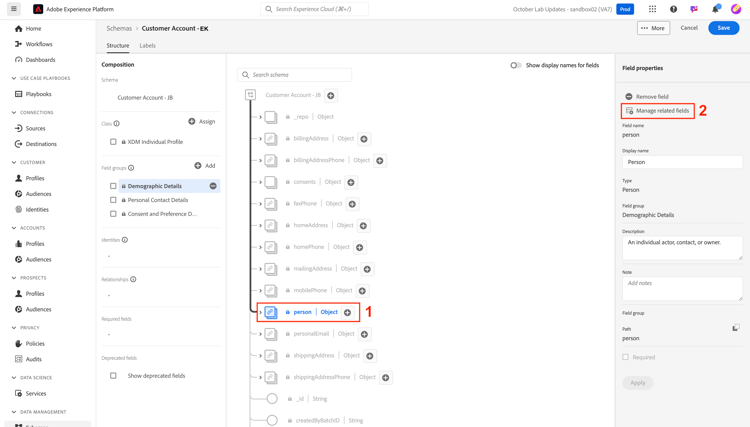
Select the person object in your schema
-
Click on the Manage related fields in the right rail
-
Expand the person object by clicking the chevron to the left of person and expand the full name object by clicking the chevron to the left of the name object. Keep only the following fields:
- person.name.firstName
- person.name.lastName
- person.birthDayAndMonth
- person.birthYear
When you are done click the Confirm button in the upper right corner.
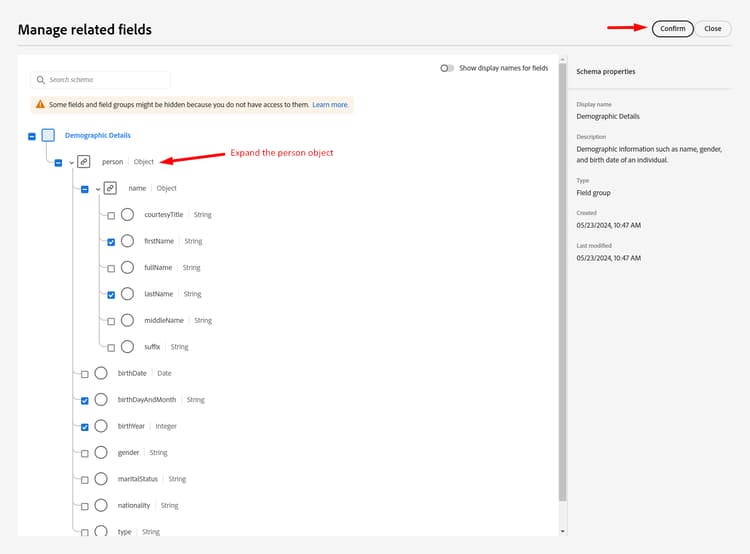
note NOTE You can click the top-most checkbox for Demographic Details to auto-deselect all child objects and then reselect only those that you need! -
When done you should see the person object in your schema as shown below. If everything looks good click the Save button to save your schema.
Consent and Preferences field group
Perform the same set of steps as you did previously but this time for the Consent and Preferences field group.
- Click on the Consent and Preferences field group name in the left rail to highlight its fields in your schema.
- Select the consents object and then use the Manage related fields process to remove fields not needed from the consent object. Keep only the following fields:
- consents.marketing.email.val
- consents.marketing.sms.val
When you are done your final schema should now look like this. Be sure to click Save before continuing on.