Model custom objects
Adding custom fields
As discussed in the lecture, there are no standard out of the box field groups or data types that model the Customer Account custom fields. The below fields currently are considered custom and must be modeled within the XDM schema.
- _<tenant-name>.account.createDate
- _<tenant-name>.account.endDate
- _<tenant-name>.account.acqSource
- _<tenant-name>.plan.planID
- _<tenant-name>.plan.name
- _<tenant-name>.customerID
Account object creation
-
Add a new field by clicking the + (add) button at the top of your schema

note NOTE Notice the right rail opens with some fields for you to fill out -
Create the account object by utilizing the below details. When done click the Apply button in the right rail to see the change in the schema workspace
(type this in and select the dropdown or hit enter)

_devbc in the screenshot. Your tenant namespace may be different. Tenant namespaces are used to differentiate custom objects from Adobe standard ones and ensure future additions/updates to Adobe standards do not conflict with custom created ones.Field groups without a lock icon. This denotes it’s a custom created field group.-
Add the following fields show below under the Account object you just created.
table 0-row-3 1-row-3 2-row-3 Field Name Display Name Type createDate Create Date DateTime endDate End Date DateTime note NOTE You notice while adding the new fields the Assign to option is already filled in and references the field group you used for the account object. -
When done your schemas account object should look like below. Save your schema!

-
Add one more custom field to the account object. Click the + (add) button next to the account object. Create the following field:
table 0-row-4 1-row-4 Field Name Display Name Type Enumerations acqSource Acquired Source String web :: Web
inStore :: In StoreThis field needs standardized values, so use the Enum & Suggested values option within the fields properties. Select Enum radio button to add validation for this field at ingestion, as well as friendly labels. Add the enum values as shown below:
- web :: Web
- inStore :: In Store
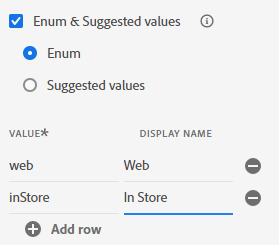
note NOTE The goal of Enum & Suggested values is make segmentation easier for the end user. Enums enforce validation at time of data ingestion whereas Suggested values do not. To learn more about this feature you can read more in the documentation here -> https://experienceleague.adobe.com/docs/experience-platform/xdm/ui/fields/enum.html?lang=en#enums-and-suggested-values -
When done click the Apply button to add the new field to the schema.
-
Save your schema
Plan object creation
Repeat the steps you performed above and add the Plan object and associated fields. All new fields should be added under the Customer Account Details - [your initials] field group.
Use the metadata in the below table to create the plan object and its associated fields.
basic :: Basic
ultimate :: Ultimate
pro :: Pro
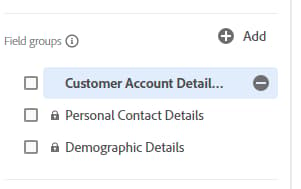
When done validate your schema matches the below screenshot. If it looks good Save your schema

Customer ID field creation
Adding the customerID field as this field is critical because it will serve as the primary identity for the schema as well as a general field to hold data in.
Perform the same steps as you have done previously and utilize the table below for referencing the metadata for the field.
customerID could be put anywhere in the schema from a hierarchical perspective. In this lab we’ve chosen to keep it at the root and not nested within one of the custom objects you previously created. This is where data architecture has opinionsYour final result should look like the screenshot below when you are complete

Final schema result
