Configure for profile
Overview
In order to utilize a schema for the Real-Time Customer Profile you need to first ensure its configured appropriately. This means taking what you identified during the LID lab as primary/person identities, relationship identities, etc. and ensuring those configurations are made to each schema. When everything is done you can then “flip the switch” and enable a schema for use with profile.
Looking at the XDM on paper Connection 5G ERD, you see the following information about the Customer Account schema. This is the work that remains to utilize the schema within the Real-Time Customer Profile.

Mark the primary identity field
Every schema requires a primary identity field if it’s to be used with the Real-Time Customer Profile. Follow the steps below to mark a field as a primary identity.
- Open the Customer Account schema you created
- Select the _<tenant-name>.customerID field by clicking on the field in the schema
- In the right rail check both the Identity and Primary identity checkboxes
- Select the customerID namespace from the dropdown
- When done click the Apply button in the right rail and then Save your changes.


Mark the person identity field(s)
Remember that every schema that is to be used with the Real-Time Customer profile optionally can contain other person identity fields. To mark a field as a person identity perform the following actions on the Customer Account schema you created previously.
- Select the personalEmail.address field
- Check the Identity checkbox found in the right rail
- Select the Email identity namespace from the dropdown
- Apply & Save your changes

Create the schema relationship
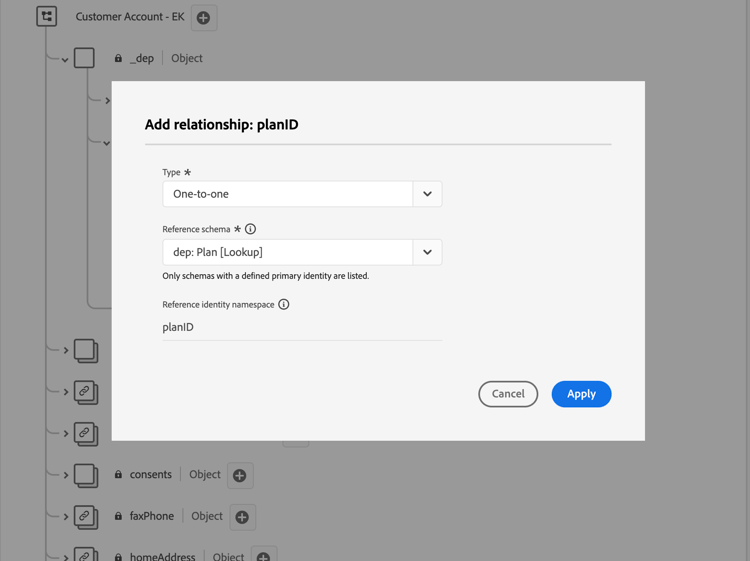
In order to relate the Plan schema to the Customer Account schema as outlined in the ERD you need to define a relationship. Follow the below steps to create a schema relationship between the Customer Account and Plan (lookup) schemas.
Add relationship
- Select the planID field within the Plan object as shown below
- In the right rail click on the Add relationship icon

Define relationship
- In the Type select box select the One-to-one option
- In the Reference schema select box choose the schema named dep: Plan [Lookup] (this was pre-created for you)
- Click Apply and Save
Confirm relationship
When you are done you should see the relationship you created display as seen in the screenshot below.

Configure schema for profile
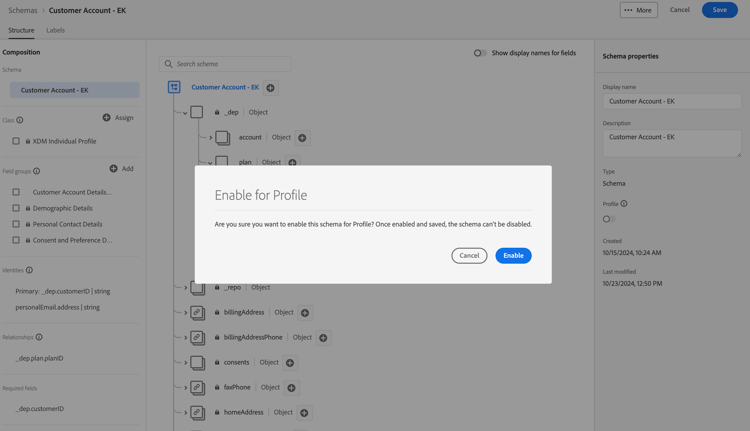
The Real-time Customer Profile merges data from disparate sources to construct a complete view of each individual customer. If you want the data captured by a schema to participate in this process, you must configure the schema for use in Profile. To do so you need to perform the following steps:
- Open your newly created Customer Account - [your initials] schema
- Click on the title of your schema from within the left rail
- Configure your schema for profile by toggling ON the Profile toggle in the right rail
- In the modal that appears click on the Enable button
- Don’t forget to Save your schema when you are done!

Review the profile union schema
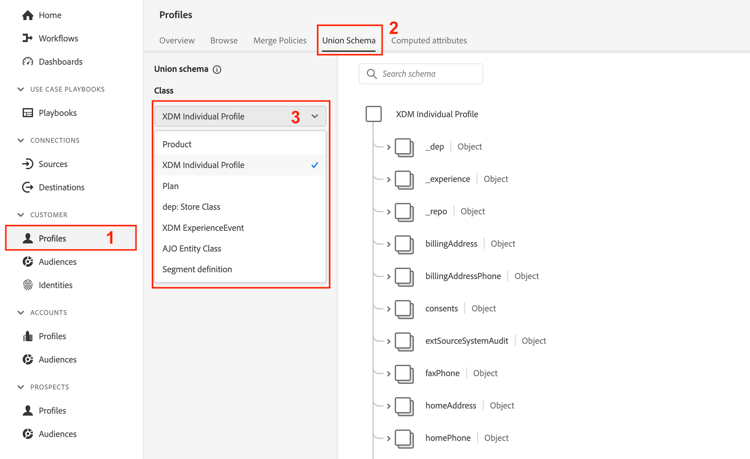
As mentioned previously the power of XDM + the Real-Time Customer Profile is the ability to assemble a variety of fragments of an individual and their behaviors together. This is referred to as the “Union View” of the customer. In the steps below, you preview what this union looks like for each XDM class that is configured for the Real-Time Customer Profile
- Navigate to Profiles in the left rail
- Select the Union Schema tab on the top menu
- Select the XDM Individual Profile class from the drop down
Browse the XDM Individual Profile class and then take a few moments to review other classes such as XDM ExperienceEvent or Plan classes.