Profile basics
Profile Union Schema
Remember that the view of any Real-Time Customer Profile is built using the schemas you defined and enabled for the profile. This is what Adobe refers to as the Union Schema of the profile.
You can see the Union Schema of the profile by doing the following:
- Click on Profiles in the left rail
- Click on Union Schema in the top nav
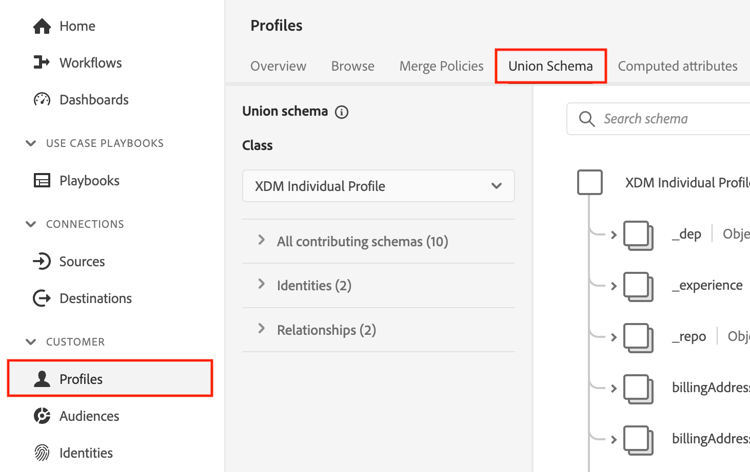
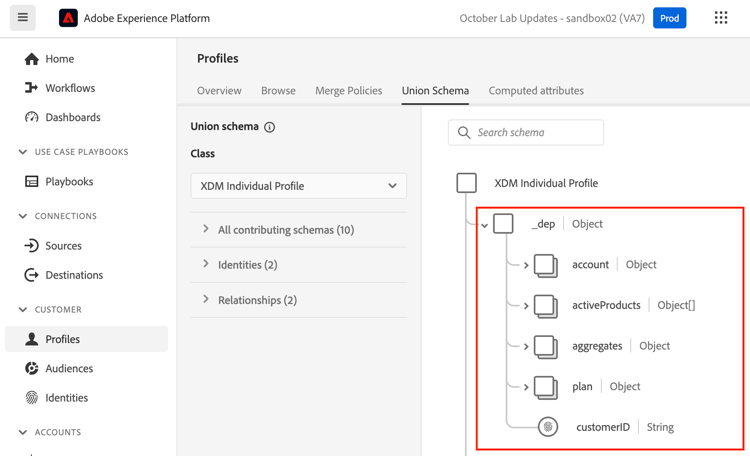
Review the Union Schema for the XDM Individual Profile class and expand out the tenant namespace. You should see a number of items here that came from various schemas you defined in the LID Methodology and XDM Modeling Labs.
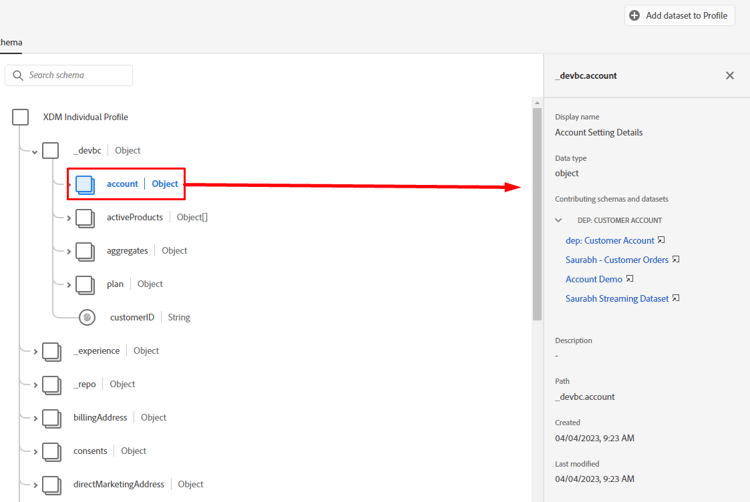
Click on the account object and notice what appears in the right rail of the screen. You can now see the details around object, what schema(s) and dataset(s) contributed to its formation and other relevant information.
Profile Lookup
- Click on Profiles in the left rail and then in the top navigation select Browse
- Select the Identity namespace of Email
- Enter the Identity value of depeche.mode@dep.com
- Click on the View button to lookup the profile
- Click on the link to the profile to see the profile’s details
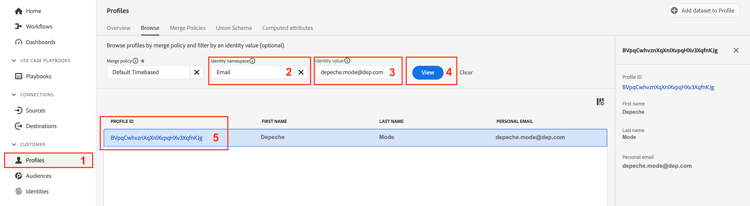
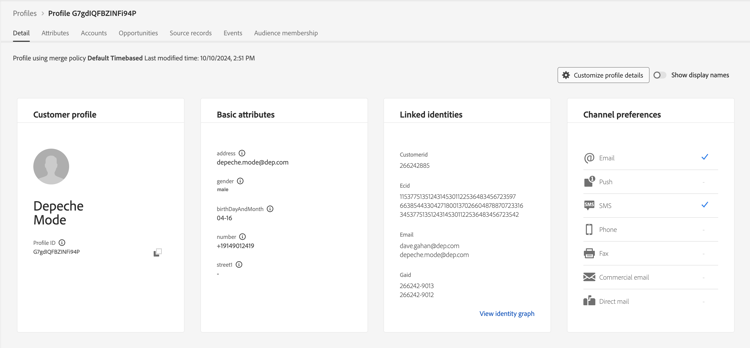
You should see this now!
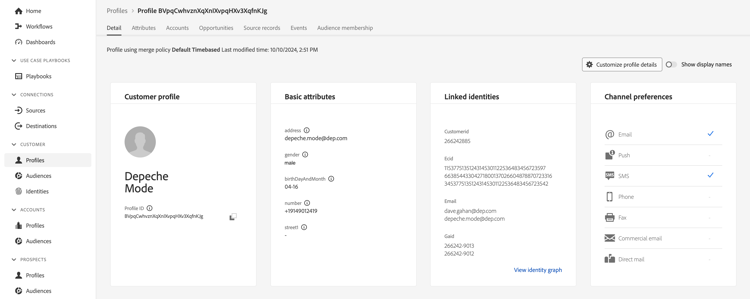
Take a minute to explore the profile, Depeche Mode, by looking at each tab in the top nav. These are the tabs that you will use:
- Detail - displays customized cards that show various aspects for the given profile
- Attributes - displays all the associated attributes for the given profile coming from the union schema
- Events - displays all the associated events for the given profile coming from the union schema
- Audience Membership - displays the audiences that the profile is currently a member of
View Attributes
Navigate to the Attributes tab and click View JSON
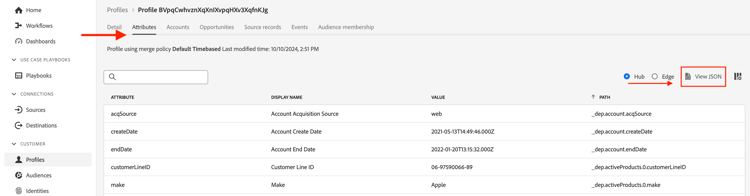
See how fields show up that came from the Field Groups you added to the Customer Account Schema.
- Look for the parent node titled entity
- Note the child object billingAddress (this came from Personal Contact Details Field Group)
"billingAddress": {
  "postalCode": "11355",
  "city": "New York City",
  "state": "NY",
  "street1": "108 Ruskin Terrace"
}
Compare this to what the Profile Union Schema has and you should lightbulb on what observable means 😄
"billingAddress": {
    "_repo": {
        "createDate": "datetime",
        "modifyDate": "datetime",
    },
    "_schema": {
        "description": "string",
        "elevation": "double",
        "latitude": "double",
        "longitude": "double"
    },
    "_id": "string",
    "city": "string",
    "country": "string",
    "countryCode": "string",
    "createdByBatchID": "string",
    "dmaID": "integer",
    "label": "string",
    "lastVerifiedDate": "date",
    "modifiedByBatchID": "string",
    "msaID": "string",
    "postOfficeBox": "string",
    "postalCode": "string",
    "primary": "boolean"
    "region": "string",
    "repositoryCreatedBy": "string",
    "repositoryLastModifiedBy": "string",
    "state": "string",
    "stateProvince": "string",
    "status": "string",
    "statusReason": "string"
    "street1": "string",
    "street2": "string",
    "street3": "string",
    "street4": "string"
}
Next look for consents object (this came from Consent and Preference Details field group)
"consents":{
   "marketing":{
      "sms":{
         "val":"y"
      },
      "email":{
         "val":"y"
      }
   }
}
Scroll down to tenant namespace, _devbc, and look for plan object (this came from a custom created field group named ‘dep: Plan Details’)
"plan": {
    "planID": "m3",
    "type": "mobile",
    "name": "pro"
}
Notice the aggregates object you defined for the upsell use case. Those fields are also under the tenant namespace _devbc. They came from a different schema (dep: Customer Aggregates) and a custom field group (dep: Aggregates)
"aggregates":{
   "rollingSixMonthAvgMonthlyDataUsage":30,
   "rollingSixMonthTotalDataUsage":200
}
View Identity Map
You can also see a profile’s associated identities as they are stored within a map based object named identityMap. Look for identityMap near the bottom of the JSON document.
This is a representation of all the identities you have passed in regardless if you used the identityMap field or marked a field using an identity Descriptor.
"identityMap": {
  "ecid": [{
          "id": "34537751351243145301122536487445728054"
      },
      {
          "id": "66385443304271800137026604878870723316"
      },
      {
          "id": "34537751351243145301122536483456723542"
      }
  ],
  "email": [{
          "id": "dave.gahan@dep.com"
      },
      {
          "id": "depeche.mode@dep.com"
      }
  ],
  "customerid": [{
      "id": "266242885"
  }],
  "gaid": [{
          "id": "266242-9013"
      },
      {
          "id": "266242-9012"
      }
  ]
}
- The identityMap you see in profile attributes is created for each profile utilizing the Identity Service’s graph*
- The Identity Graph only cares about relationships between identities. Each identity is treated the same. A is related to B and it does not matter if it was via a primary identity, person identity, etc.
- Identity Graph is constantly recording new relationships and the values within those relationships as data flows into its service
- Profile’s behavior is to overwrite existing field values with new values as data is ingested into its service
- When you flag a field with an identity descriptor it is still a field for Profile
Identity Graph
Navigate back to the Detail tab in the top nav and click on the View Identity graph link found at the bottom of the Linked identities card
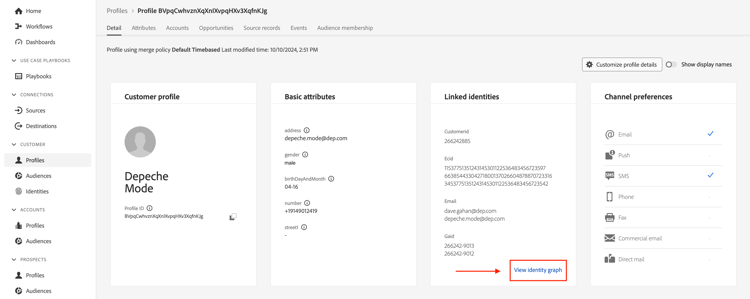
You should now see this screen.
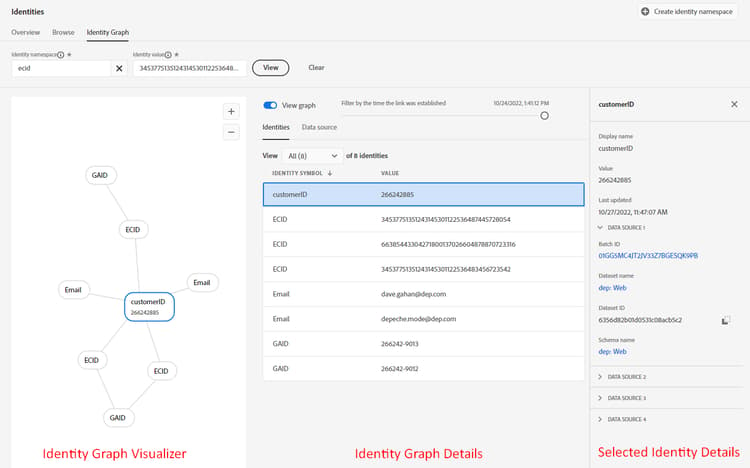
The view above is the Identity Graph of the Depeche Mode profile and is broken up into a three (3) key areas:
Identity Graph Visualizer - shows the identities and their associated relationships within the profiles identity cluster
Identity Graph Details - provides specific details around the overall identity graph namespaces, values and data sources that created all the relationships seen within the Identity Graph Visualizer
Selected Identity Details - displays detailed information on the selected identity along with the last five (5) batches where that identity was processed in a relationship
View the identity graph of Depeche Mode using the customerID identity instead. Perform the following actions:
- Copy and save the customerID somewhere.
- Change the namespace value in the Identity namespace box to customerID
- Paste in the customerID value you saved from the previous step
- Click the View button to see the identity graph that contains this identity using the new identity value
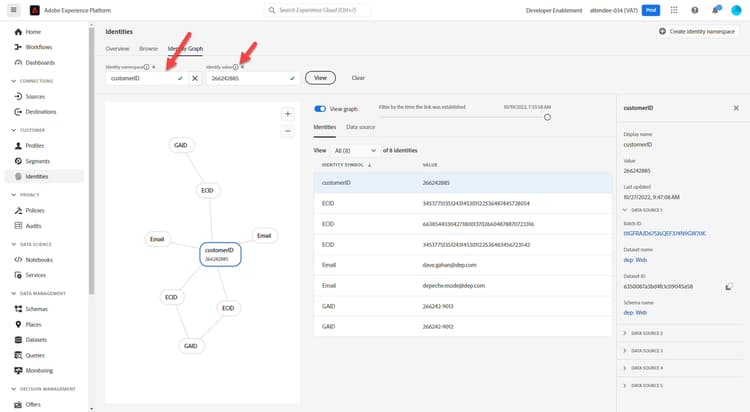
Changing Identities
Go back to the Profile Viewer and lookup Depeche Mode using the customerID now
- Change the Identity namespace to customerID
- Update the Identity value using the customerID value you saved in the last section
- Click the View button
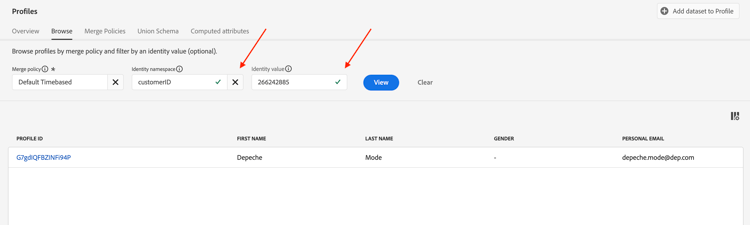
You should see the same profile you just viewed previously!