Create a new dataflow
Navigate to Sources
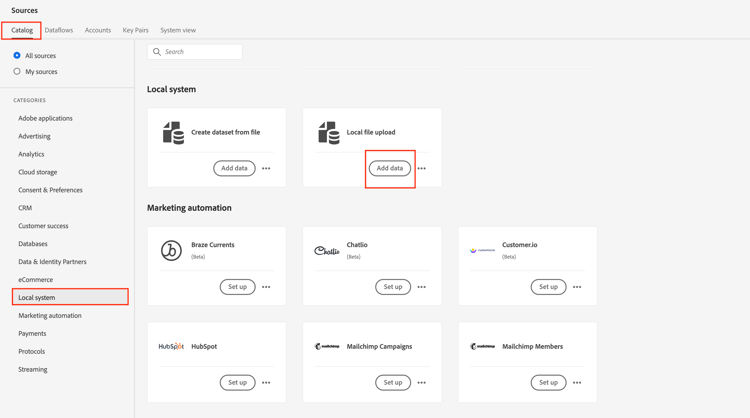
- In Adobe Experience Platform UI navigate to the following location:
Sources -> Catalog -> Local system - Next click on Add Data button for the Local File upload card
Set up the dataflow
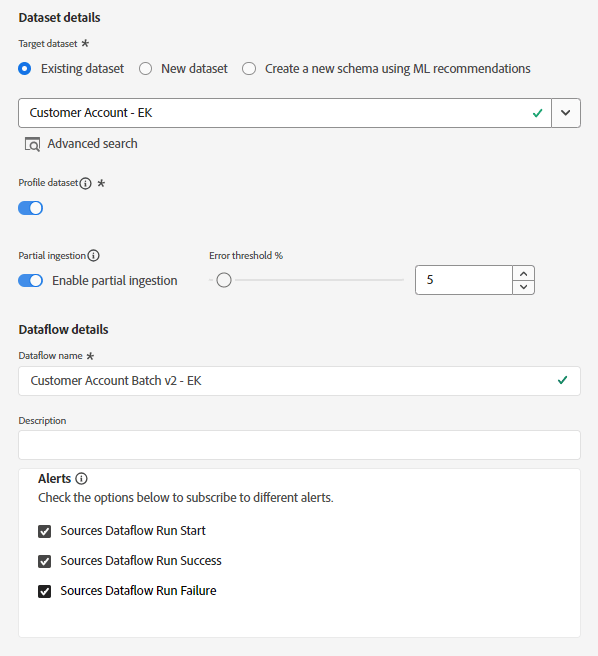
- In the Dataflow detail screen, choose Existing dataset.
- Use the dataset you created previously with the name Customer Account - <Your Initials>
- Ensure you have the Profile dataset toggle turned ON.
(If you do not turn this on, the Profile Store will not be able to monitor for new data entering this dataset and hence will not ingest this data into Profile) - Ensure you have the Enable partial ingestion toggle turned ON
(If you do not turn this on, the whole ingestion may fail if just one of the records has an error) - Set the Dataflow name as Customer Account Batch v2 – <Your Initials>
- Turn on all the alerts Sources Dataflow Start/Success/Failure
- If everything looks good click the Next button in the upper right corner of the screen to continue to the next step.
Upload sample file
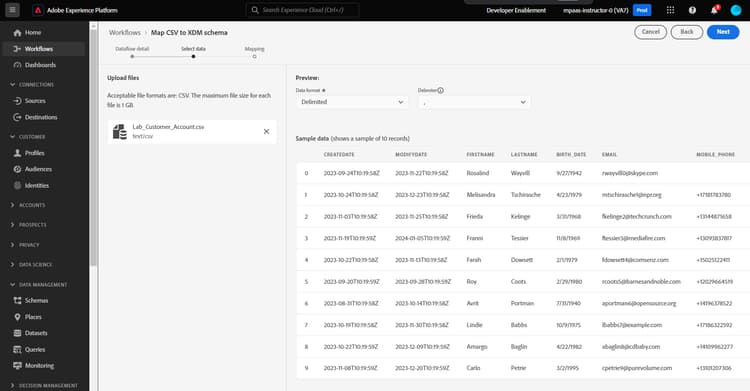
- Drag 'n drop and/or upload the Lab_Customer_Account.csv file in the UI. When done your screen should look like below.
Import mappings
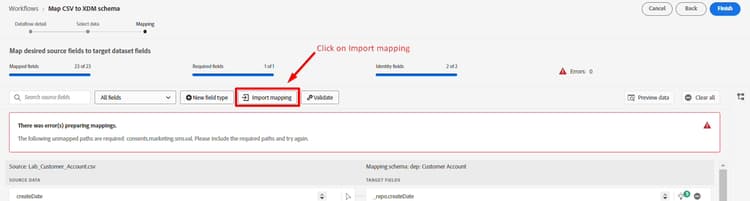
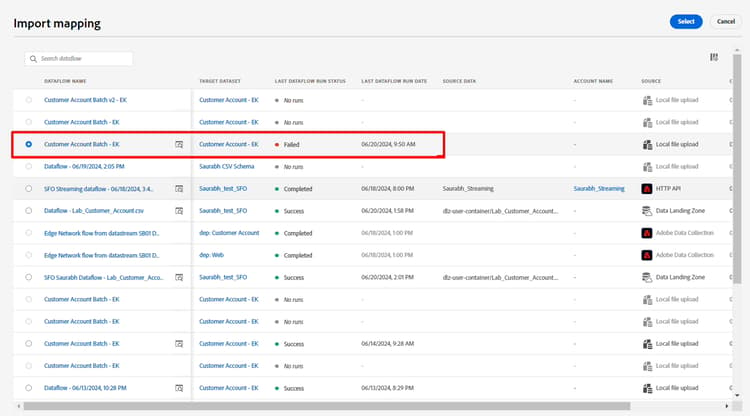
On the mapping screen instead of setting up all your mappings again you can import the ones you previous created.
- Click on the Import mapping button
- Select the dataflow that has the mapping you previously created
NOTE
Importing mappings is a handy way to reuse mappings from other dataflows and reduce the amount of mapping work you need to perform
recommendation-more-help
blueprints-learn-help-blueprints